The expensive and expansive week !!!
1. I started with basic geometries and then used parametric techniques to fiddle around with various parameters to see which one leads to what change.
2. Its great to see how form and shape matters so much in pneumatics.
3. As I proceeded with this week, I realized that integrating electronics could lead to responsive soft robotics- an experiment to try some day.
Soft Robotics modelling
Soft Robotics is the specific subfield of robotics dealing with constructing robots from highly compliant materials, similar to those found in living organisms.
Soft robotics draws heavily from the way in which living organisms move and adapt to their surroundings. In contrast to robots built from rigid materials, soft robots allow for increased flexibility and adaptability for accomplishing tasks, as well as improved safety when working around humans. These characteristics allow for its potential use in the fields of medicine and manufacturing.The bulk of the field of soft robotics is based upon the design and construction of robots made completely from compliant materials, with the end result being similar to invertebrates like worms and octopuses.
Differential growth soft robotics
Brief Overview:
What is Differential Growth?
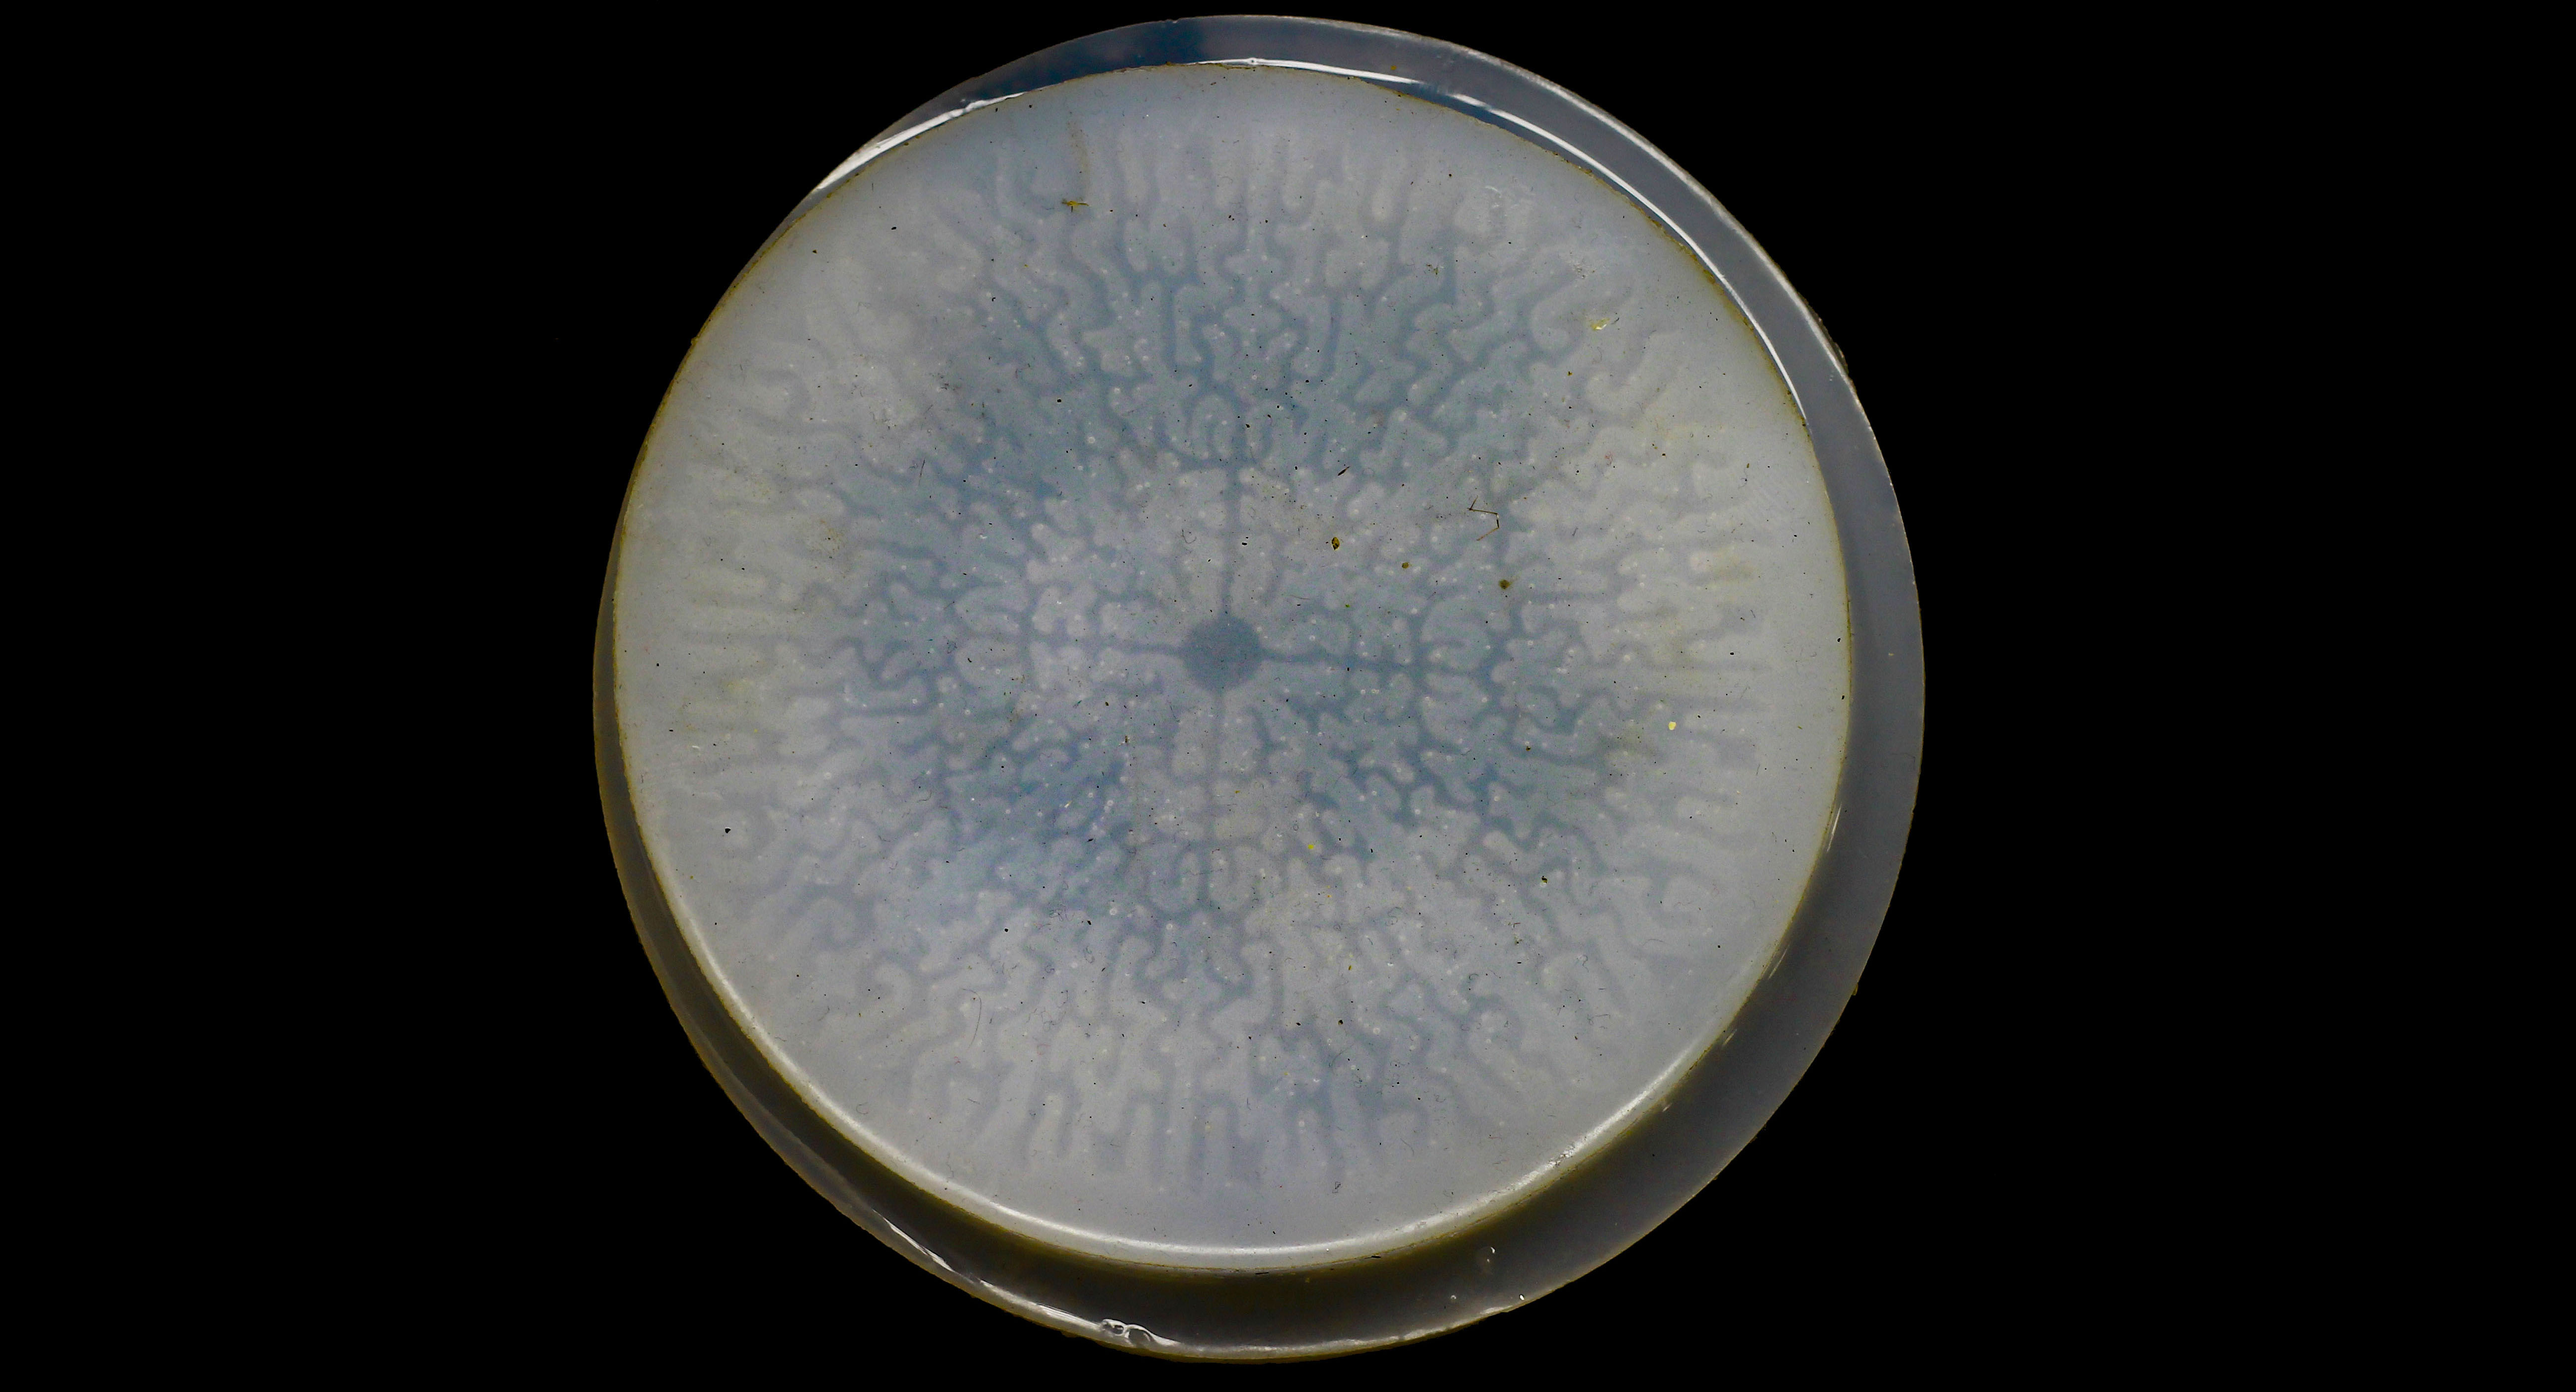
How does an organism go from a single cell to a complex differentiated structure? If a single cell were to divide and grow uniformly, it would result in a wrinkled blob. However, through carefully coordinated subdivision and differentiation, biological systems produce structures with specific, reproducible forms and functions. Growth isn’t uniform but instead differential.To put it simply, some areas grow more than others, and this leads to the formation of macroscopic shape. These shapes result from the interplay between the underlying cellular growth processes and the mechanics of the materials themselves.( by nervous system)
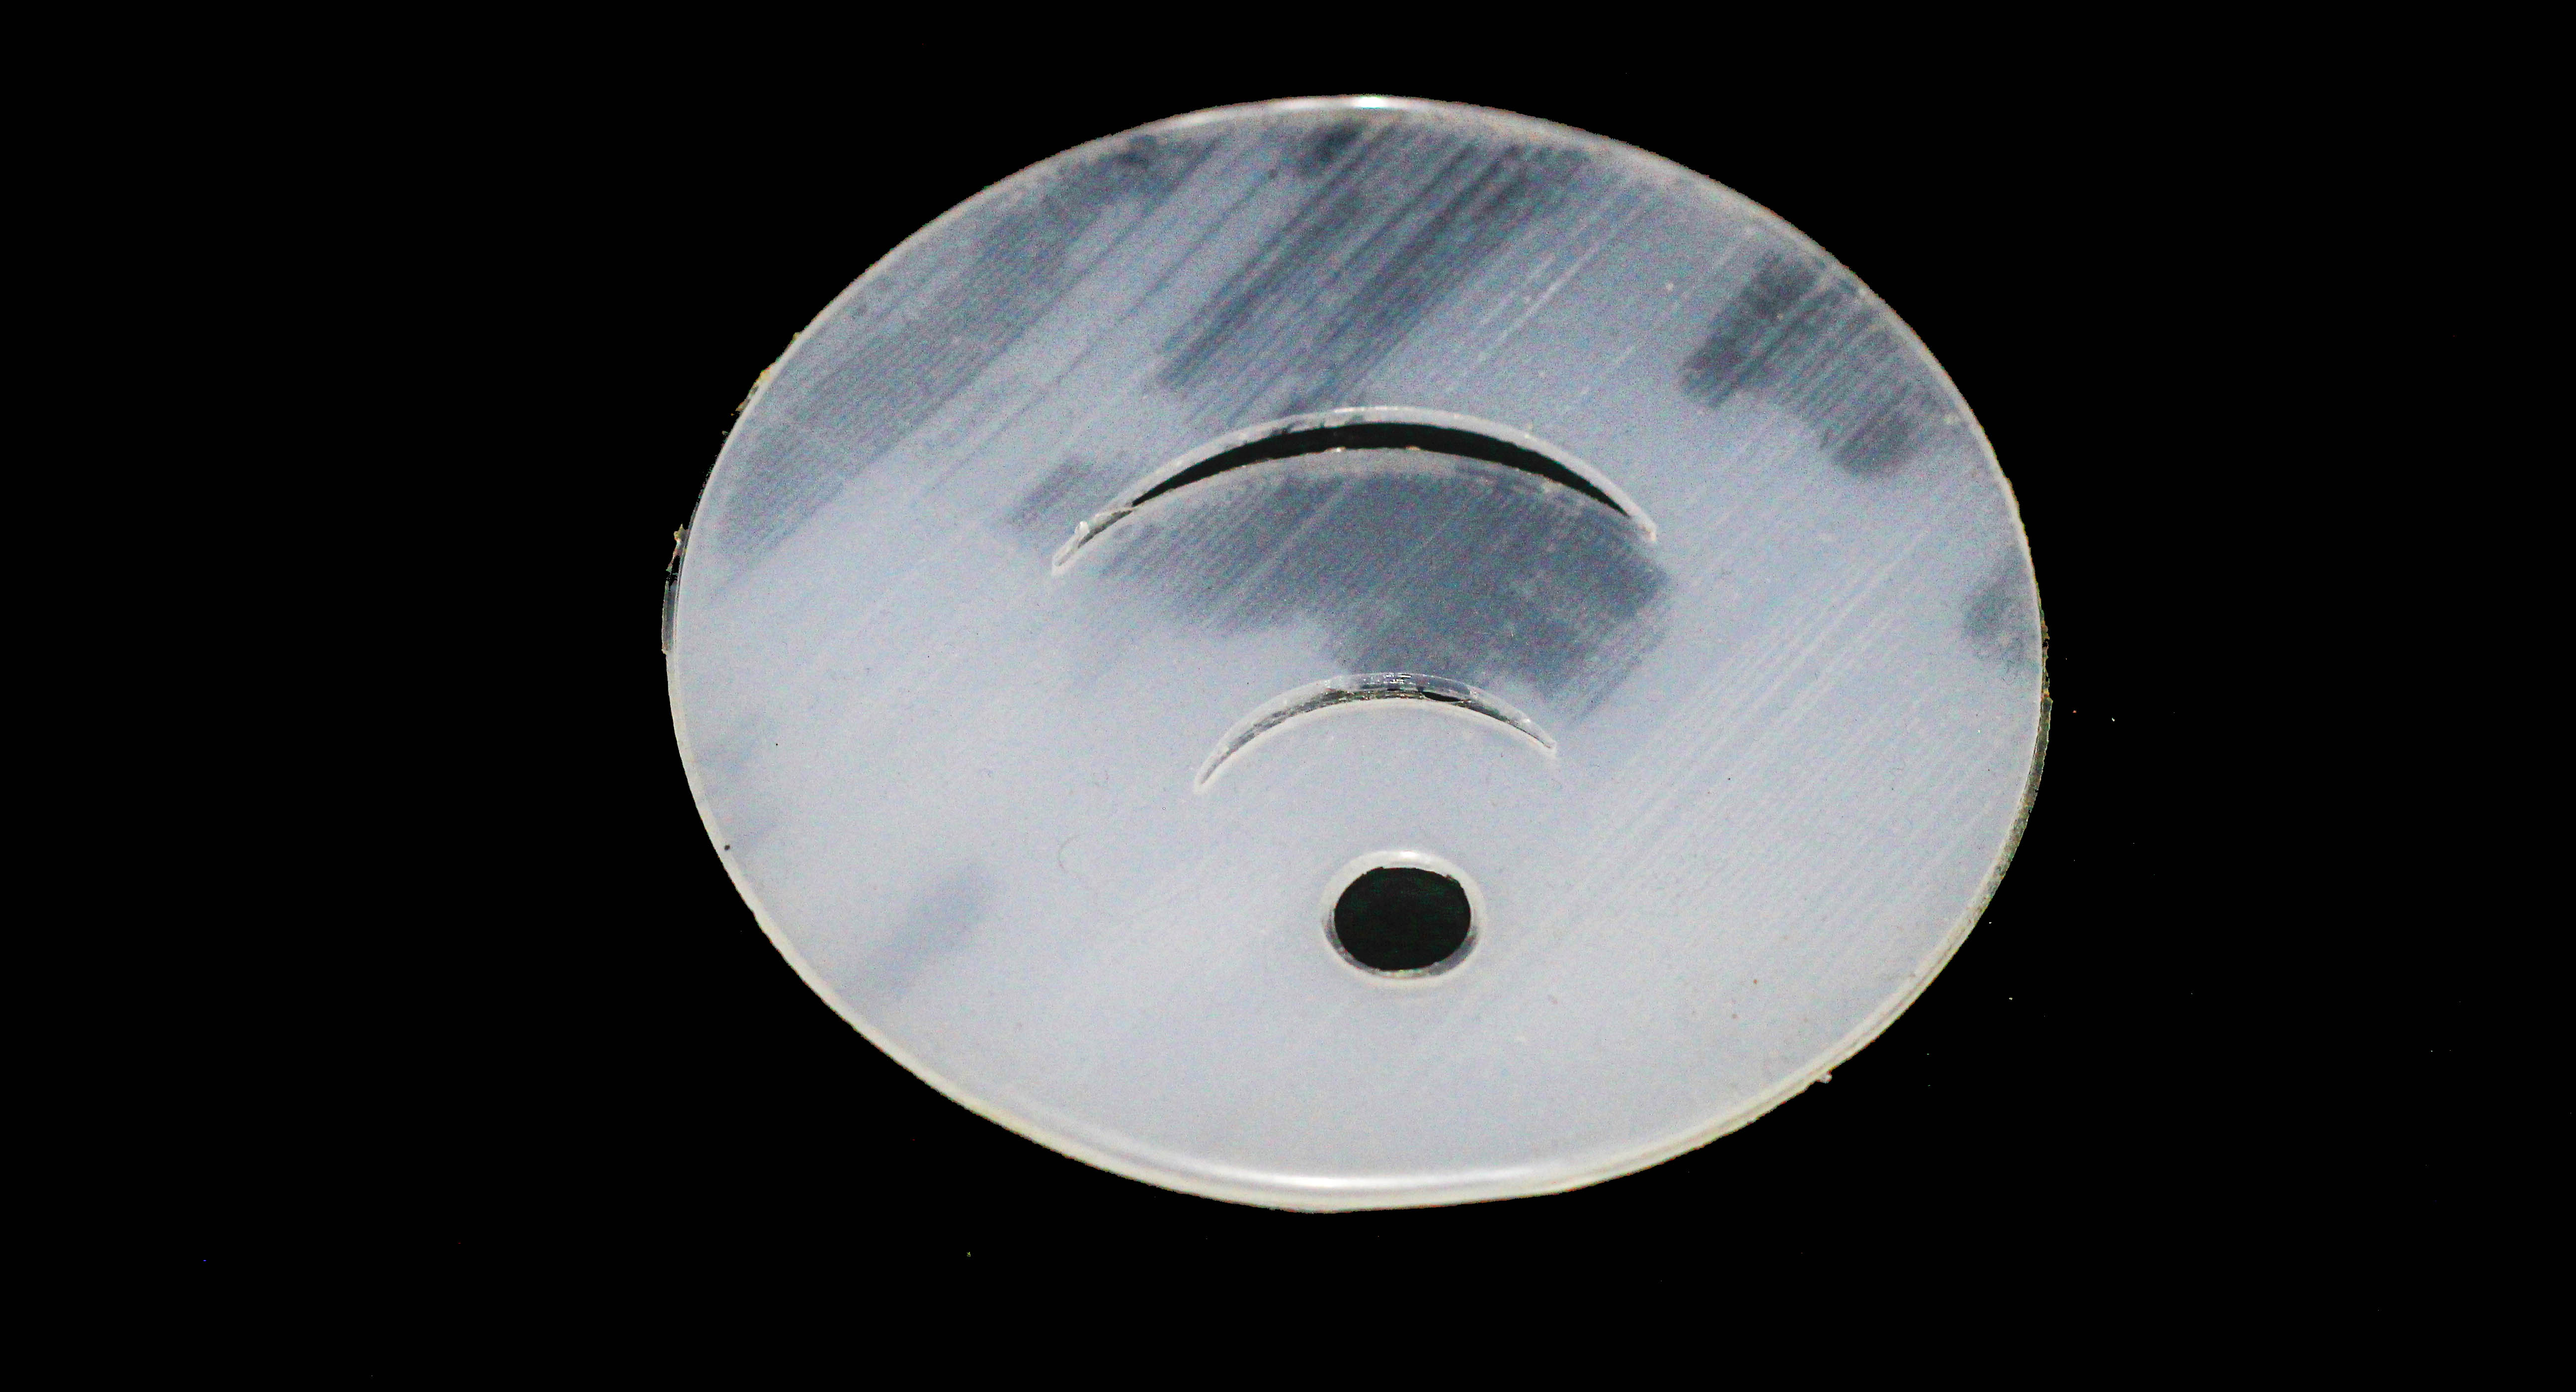
Differential growth can be seen by how our organs grow at different rates to each other like our brain. For this particular experimentation I looked into two dimentional differential growth pattern and how the form will evolve on inflating using air. This particular pattern would result in a dome upon inflating, lets see how the process works and what are the results.
Modelling
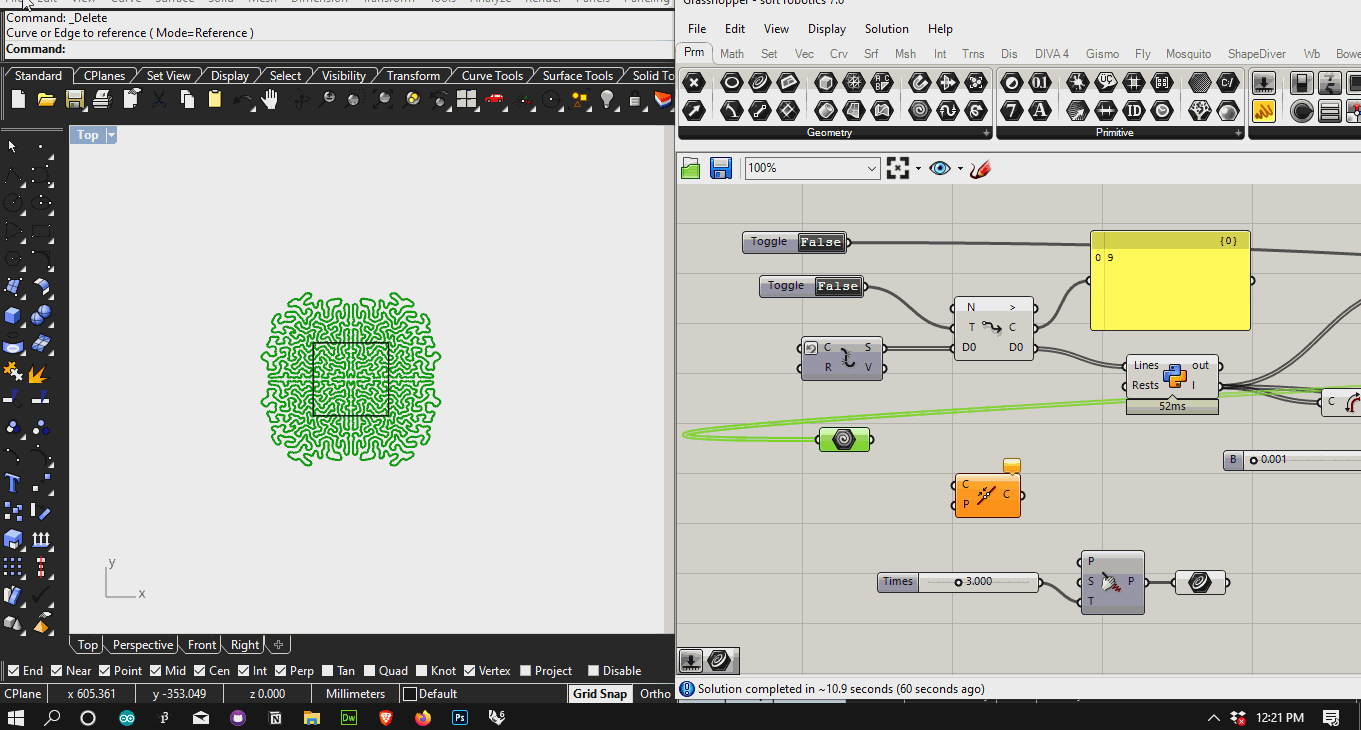
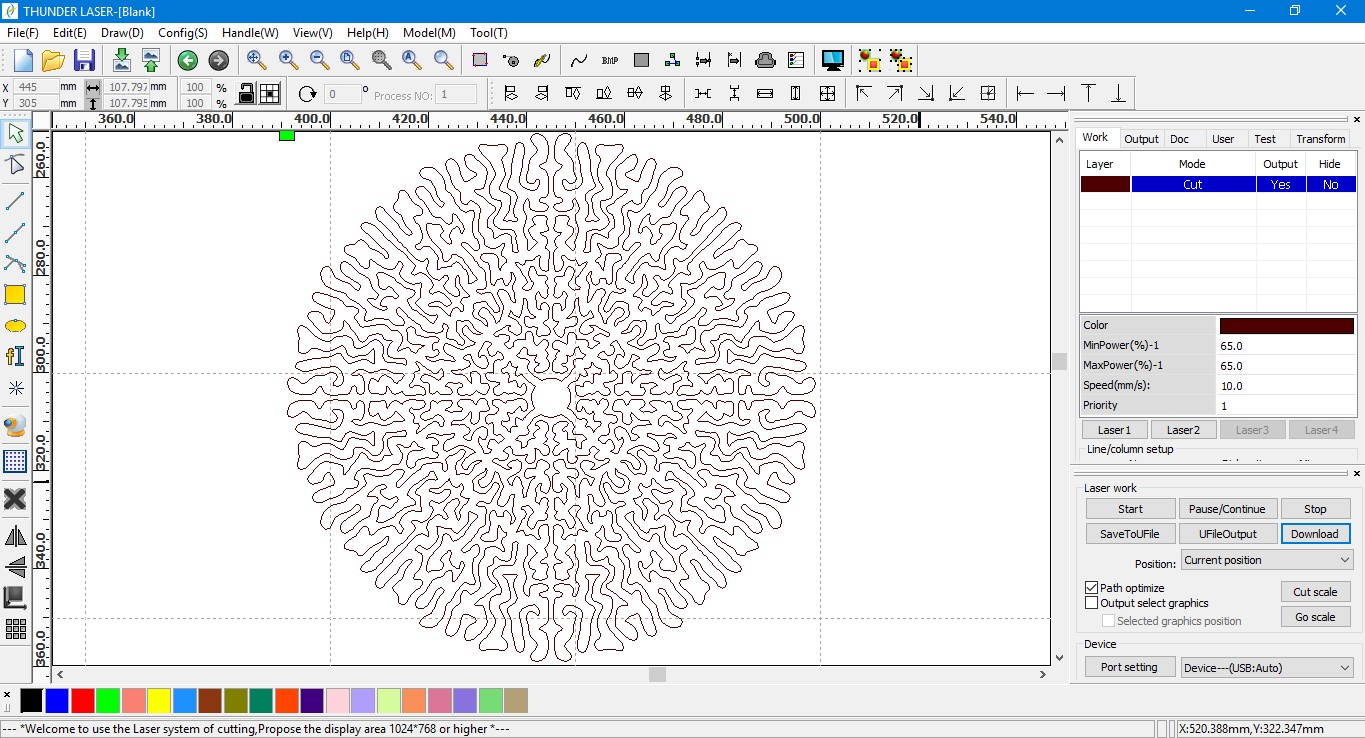

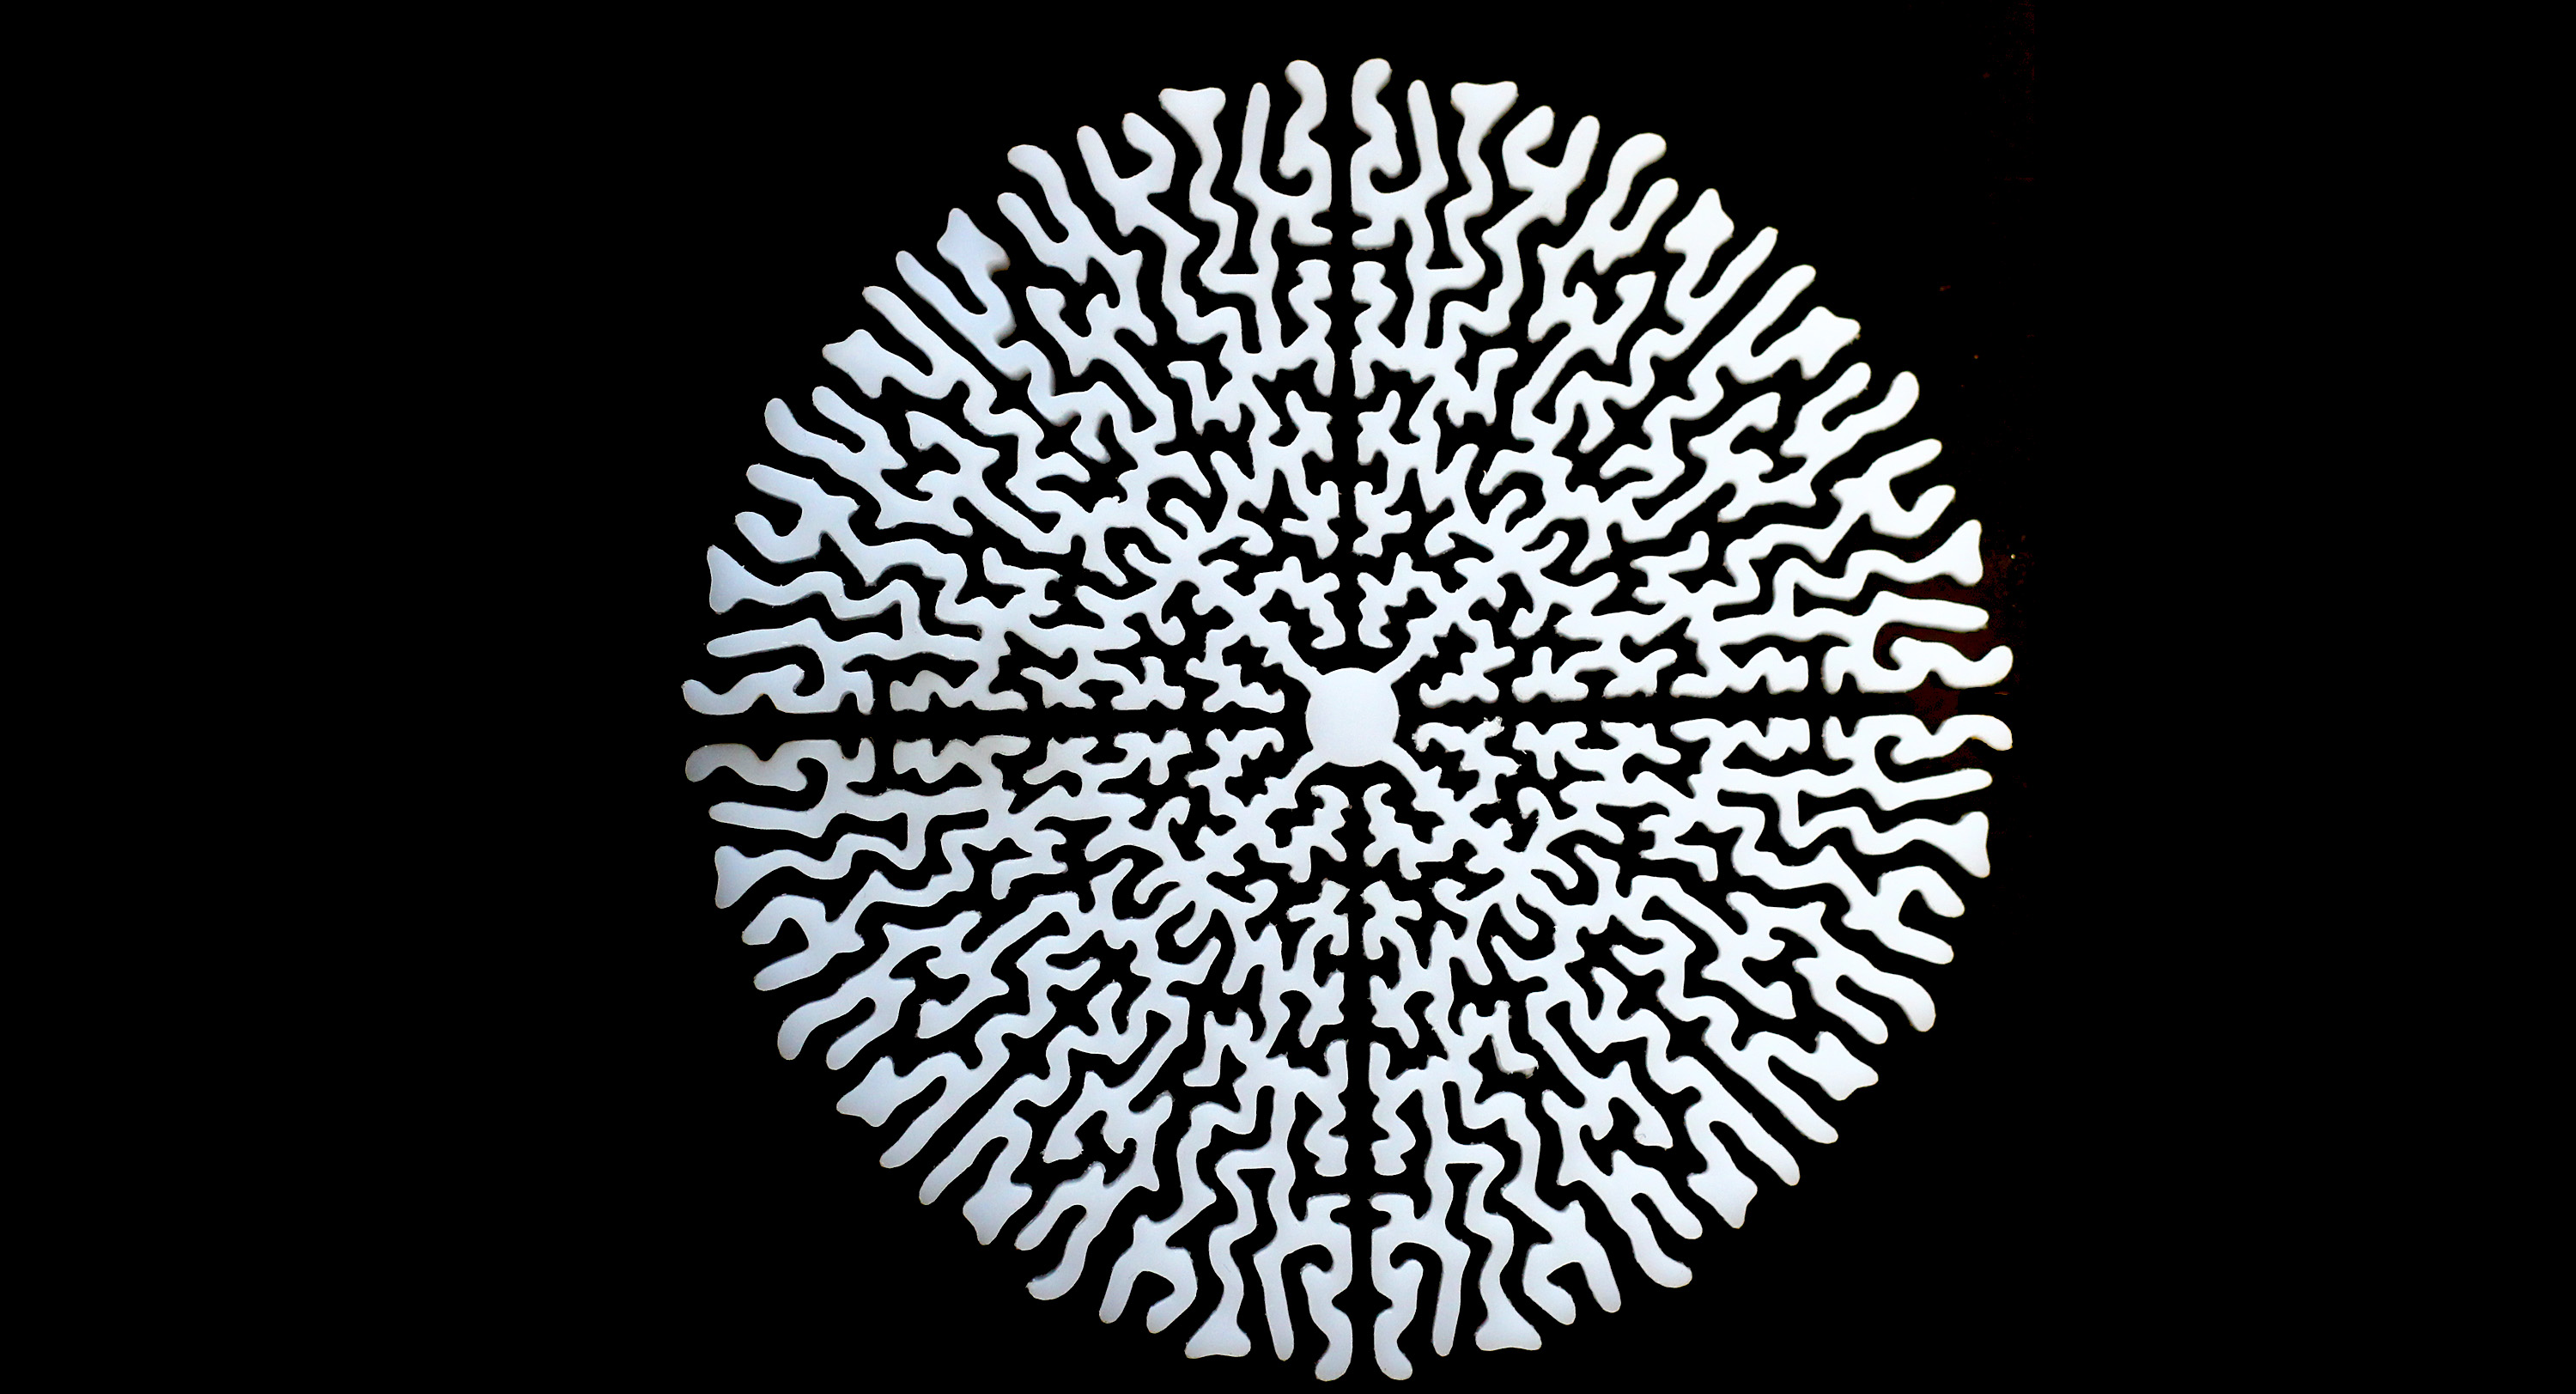
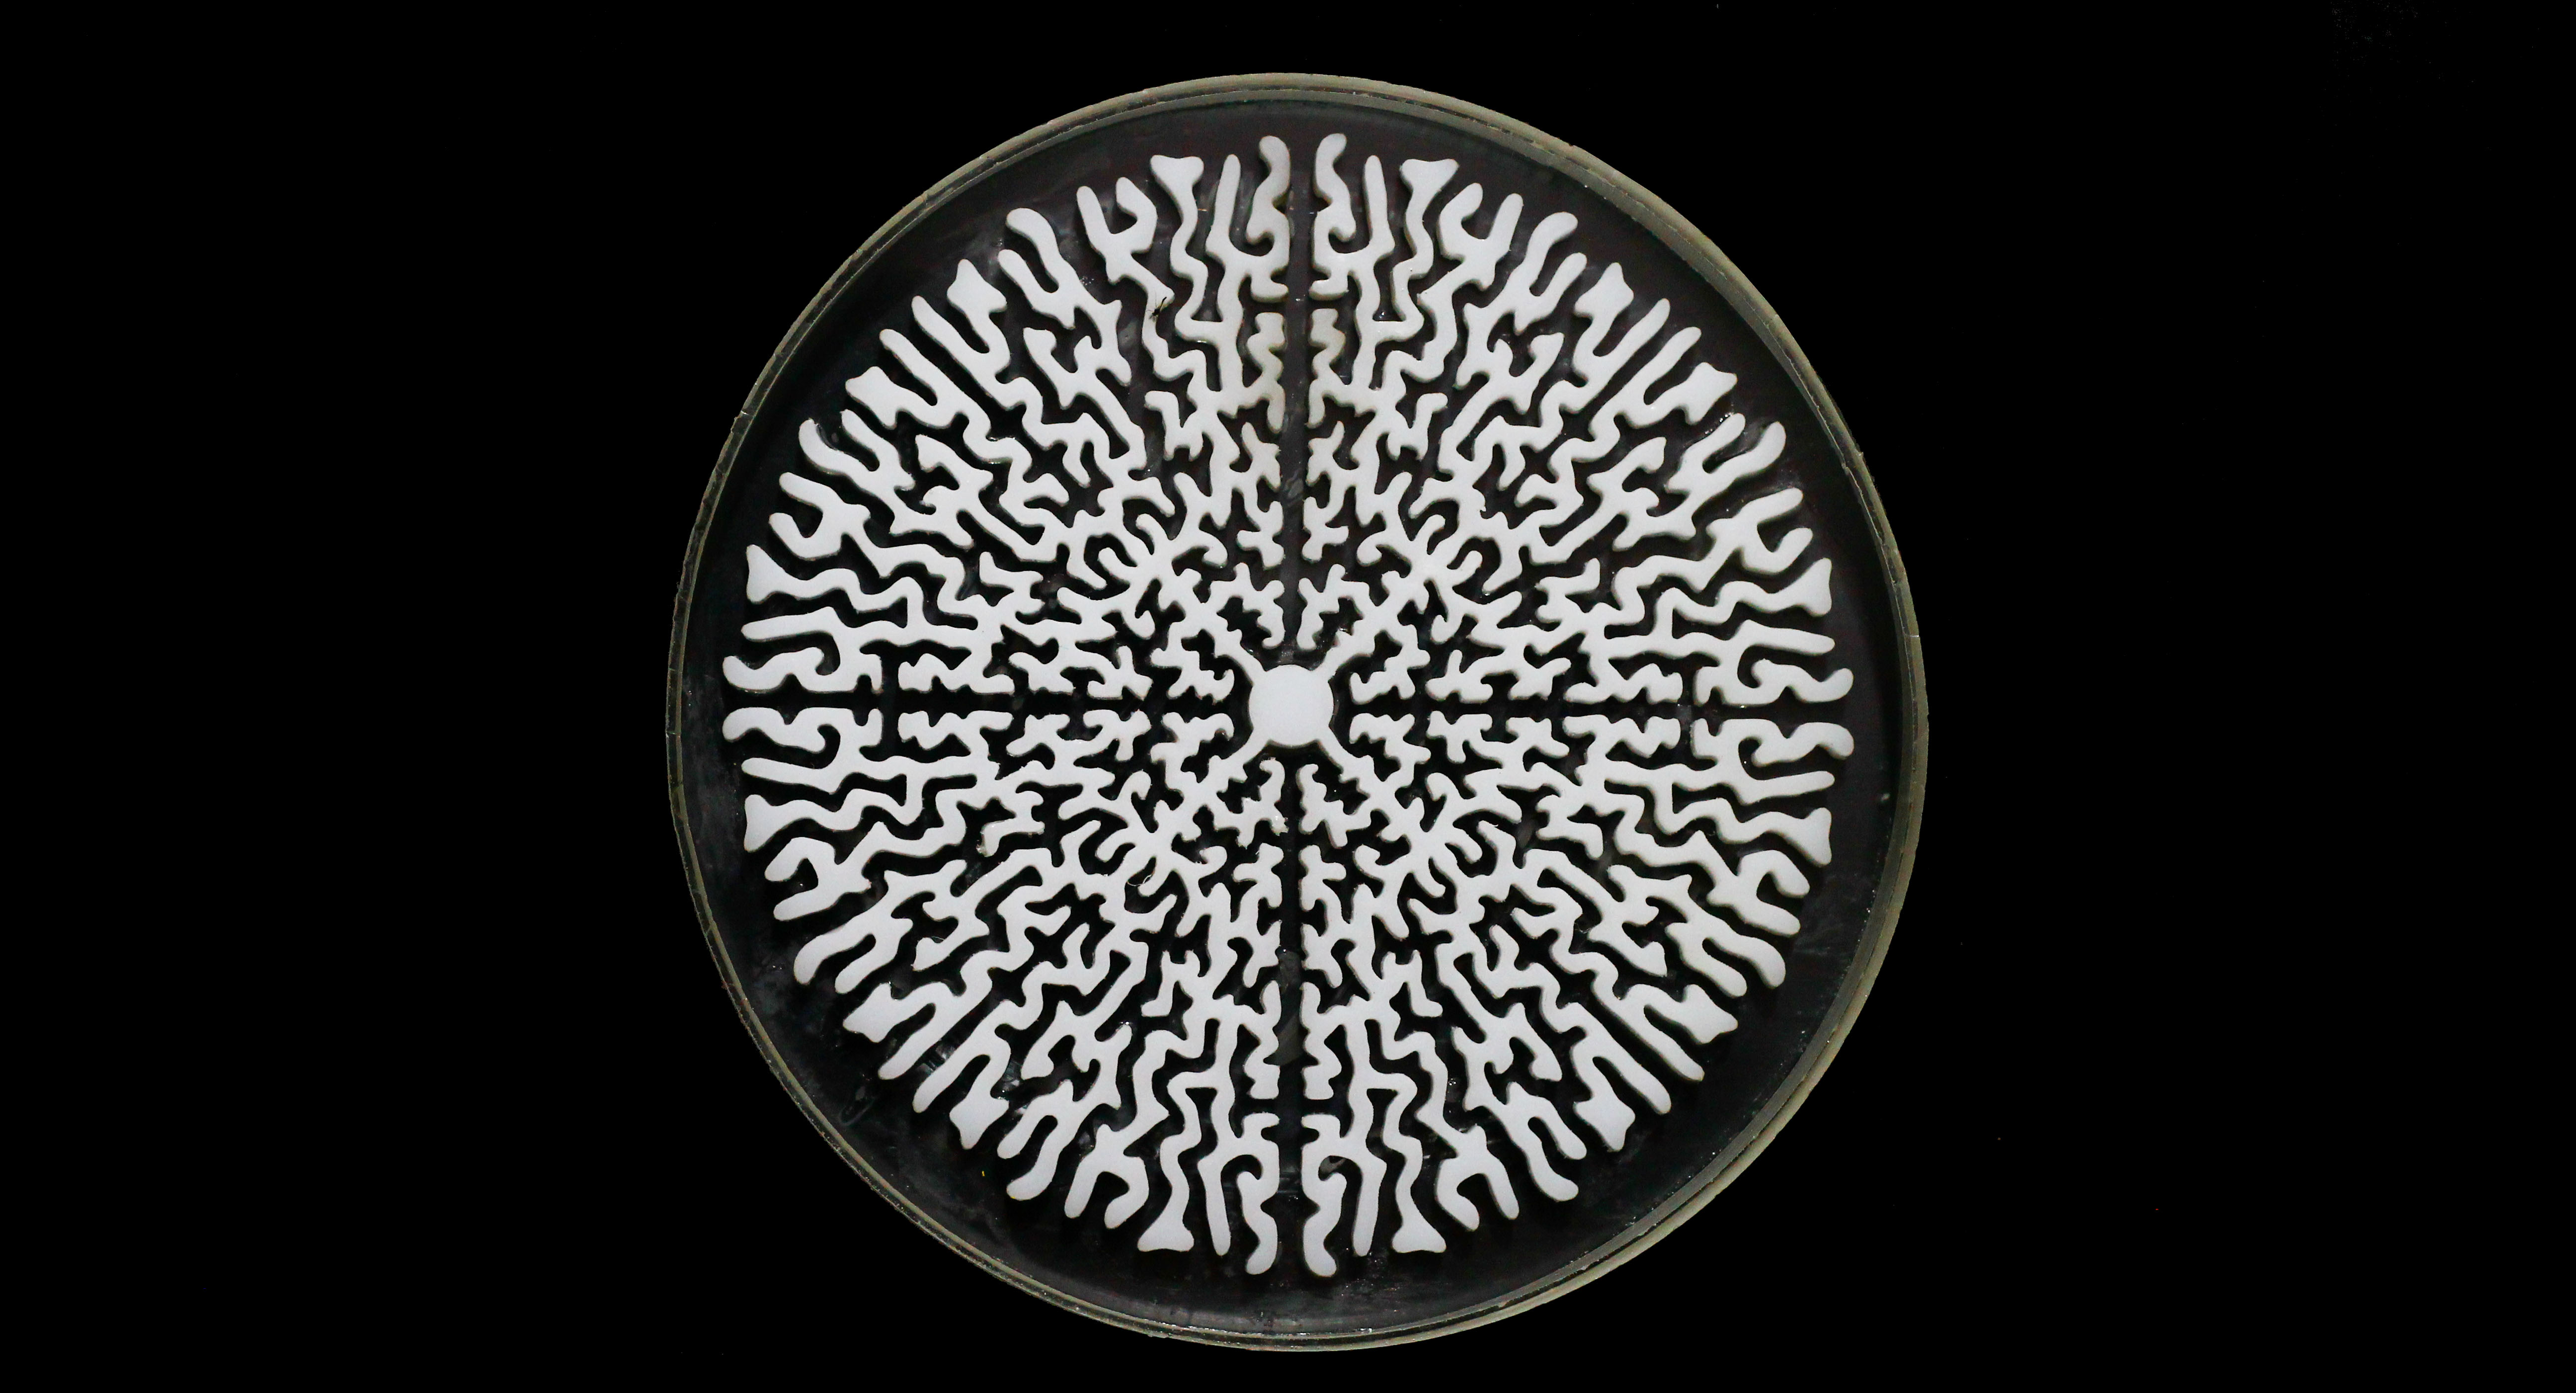
Grasshopper, a plugin for Rhino 3D is a great platform for modelling the differential growth patterns. The way it works is that the algorithm takes a closed curve as an input and then starts generating differential growth patterns over a period of time in a loop. The overall process in grasshopper has to be stopped otherwise it keep on going forward. For my experimentation, I took square as an input and then kept running the algorithm for a minute.
Making- preparation of the mold
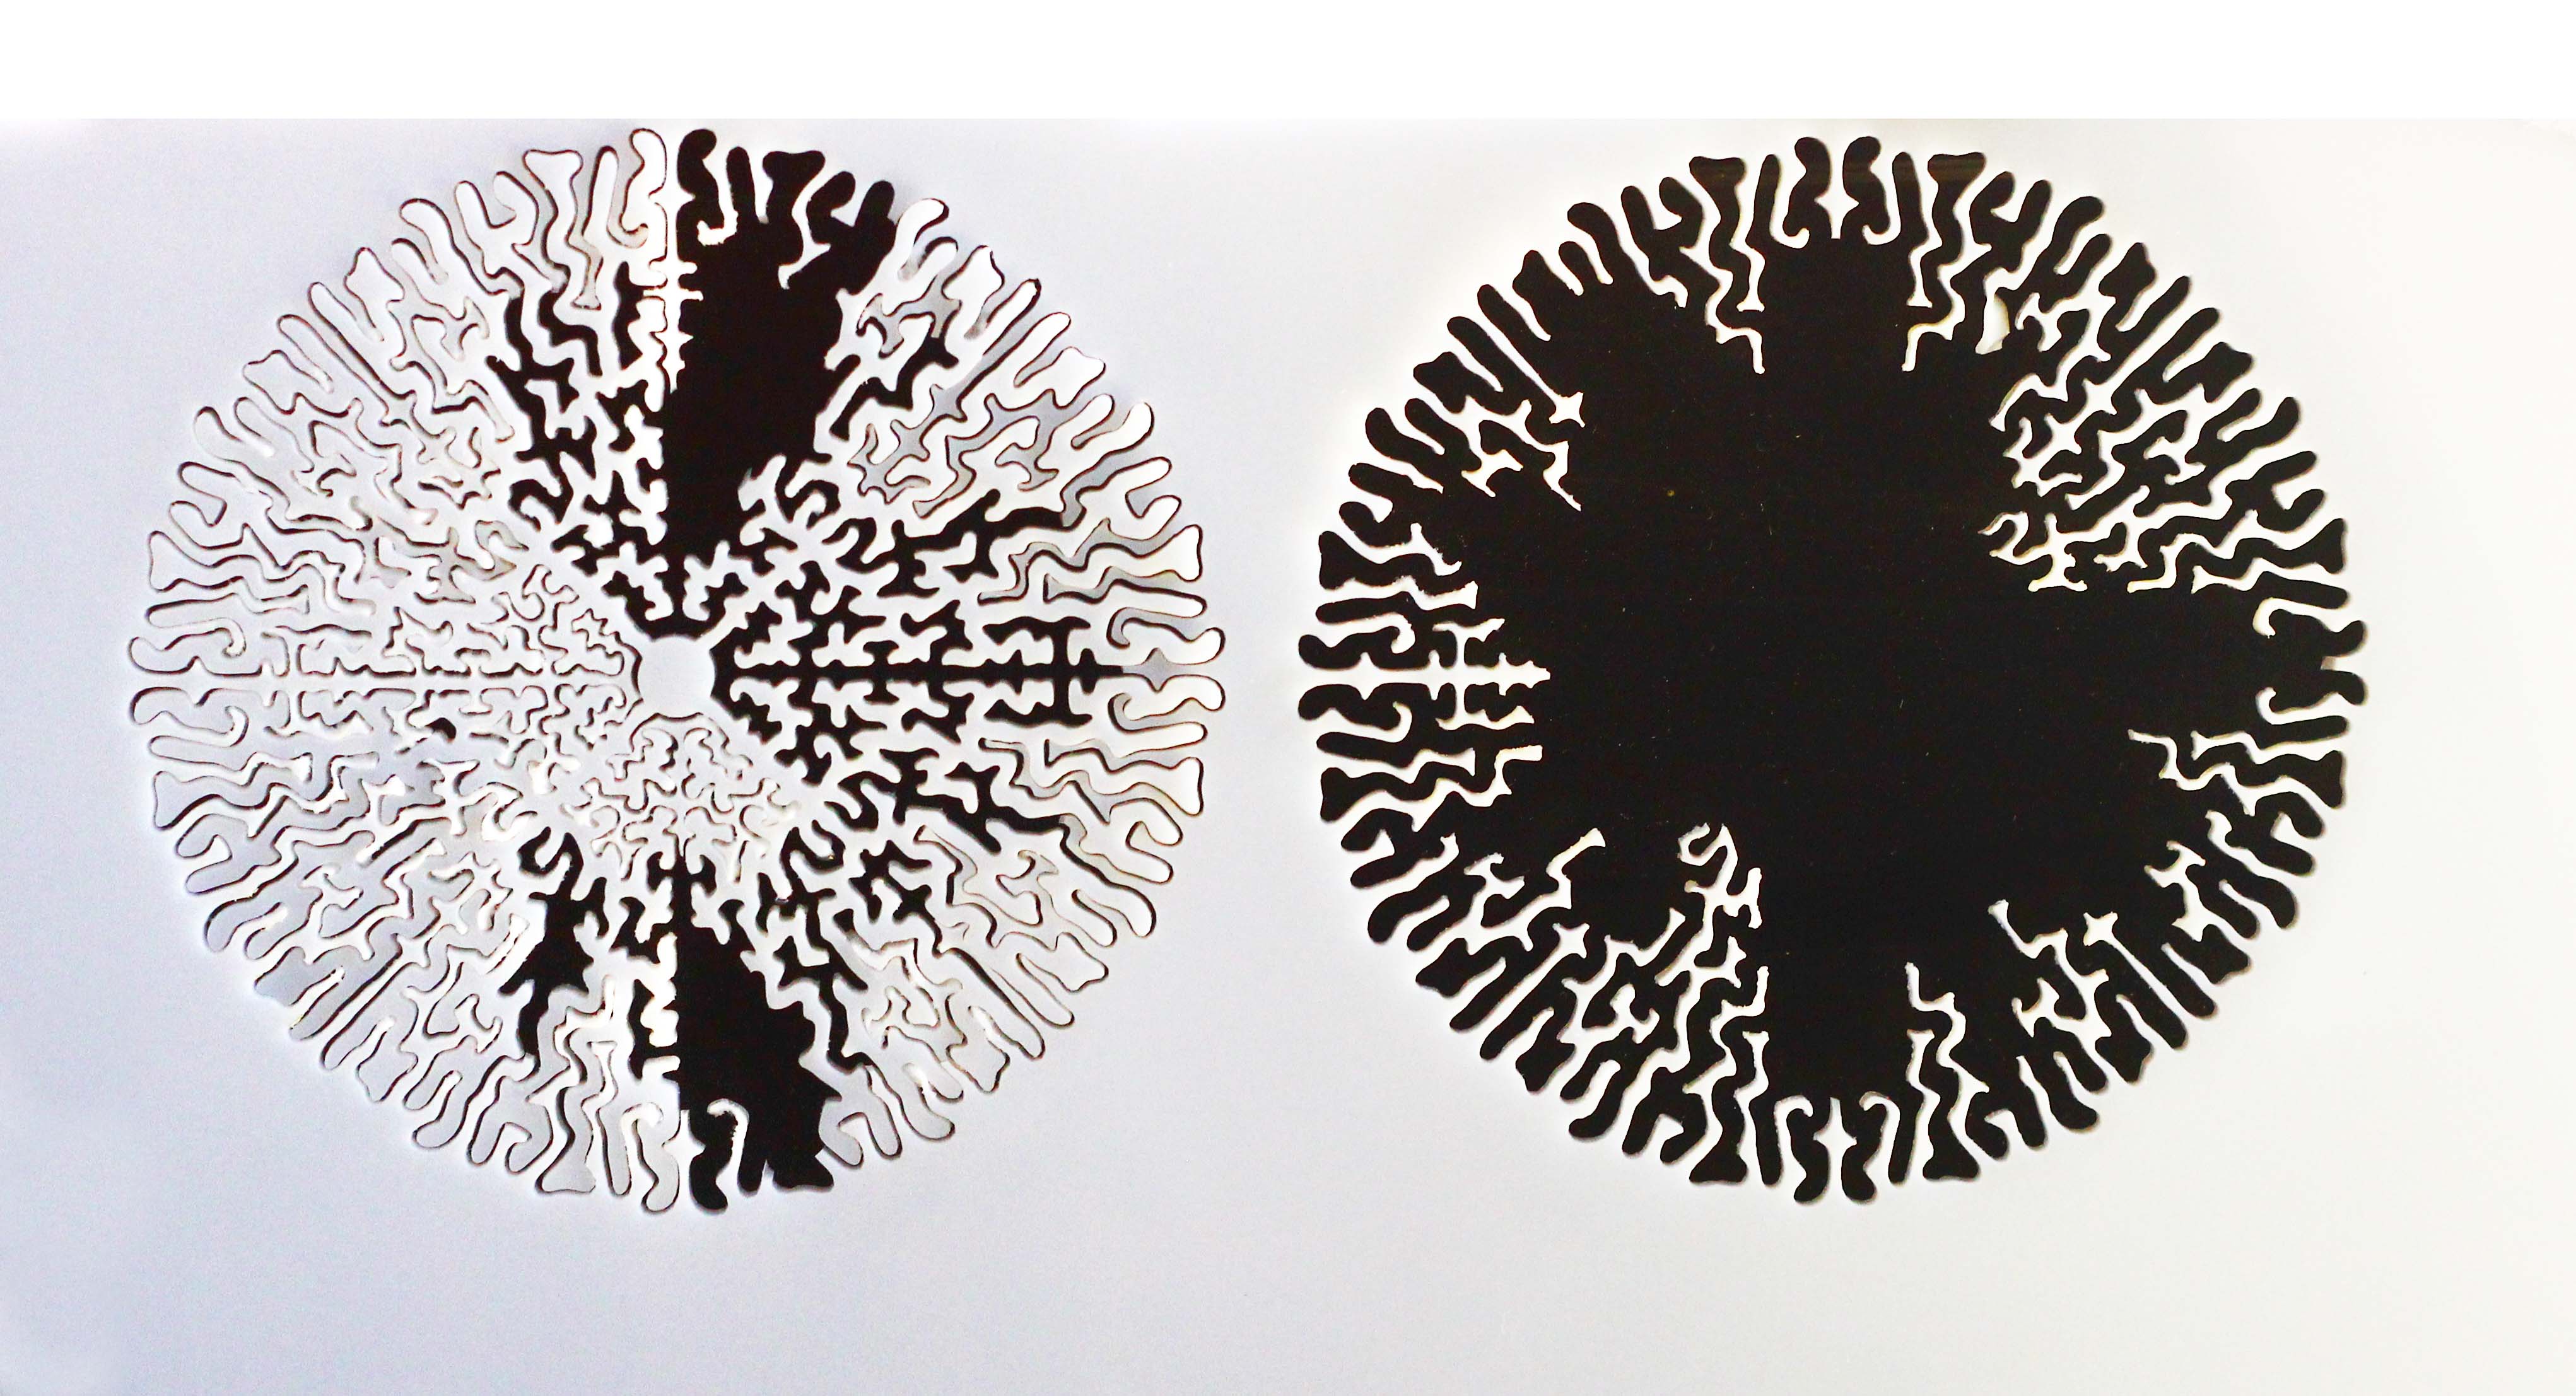
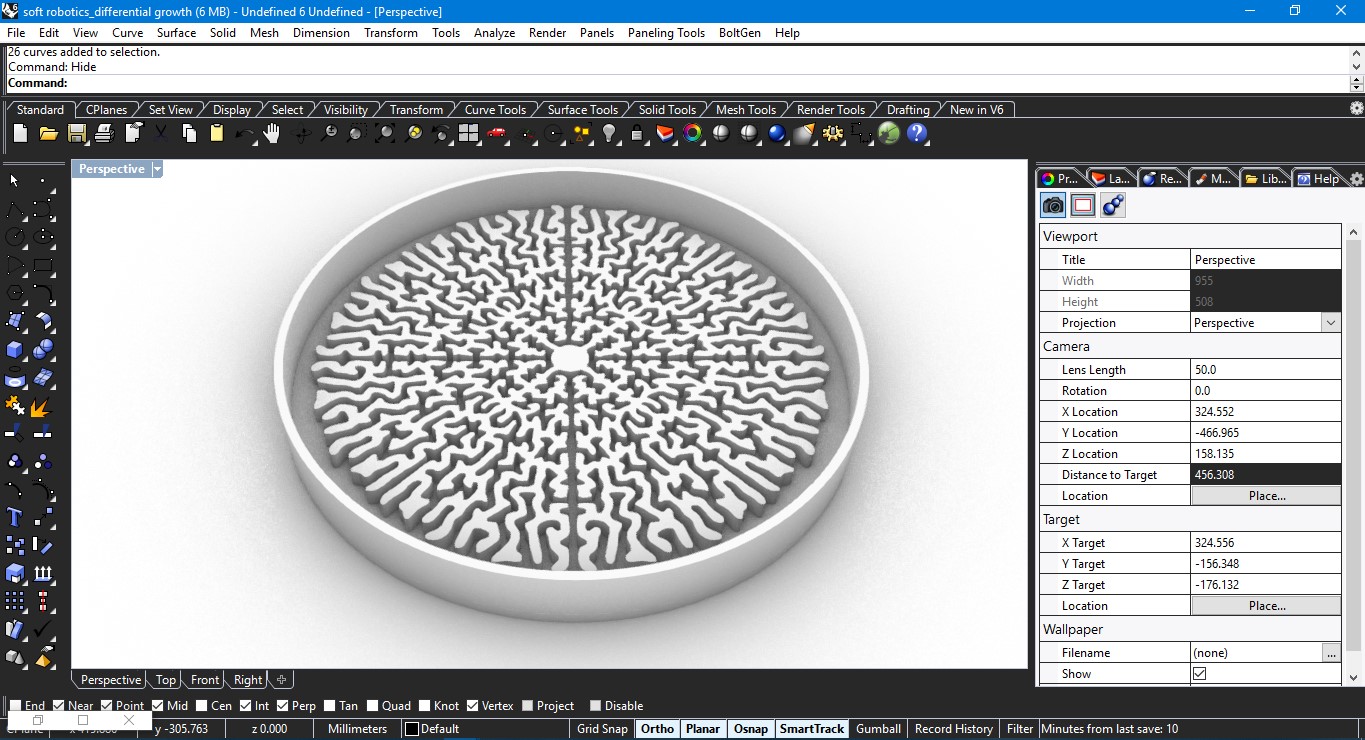
After creating the geometry which is essentially a closed loop I laser cut it using a white plexiglass. It took couple of attempts to get the intricate pattern put of the plexiglass. Creating the base and the boundaries wasn't a tough task and I milled it using a transparent plexiglass.
Inflating
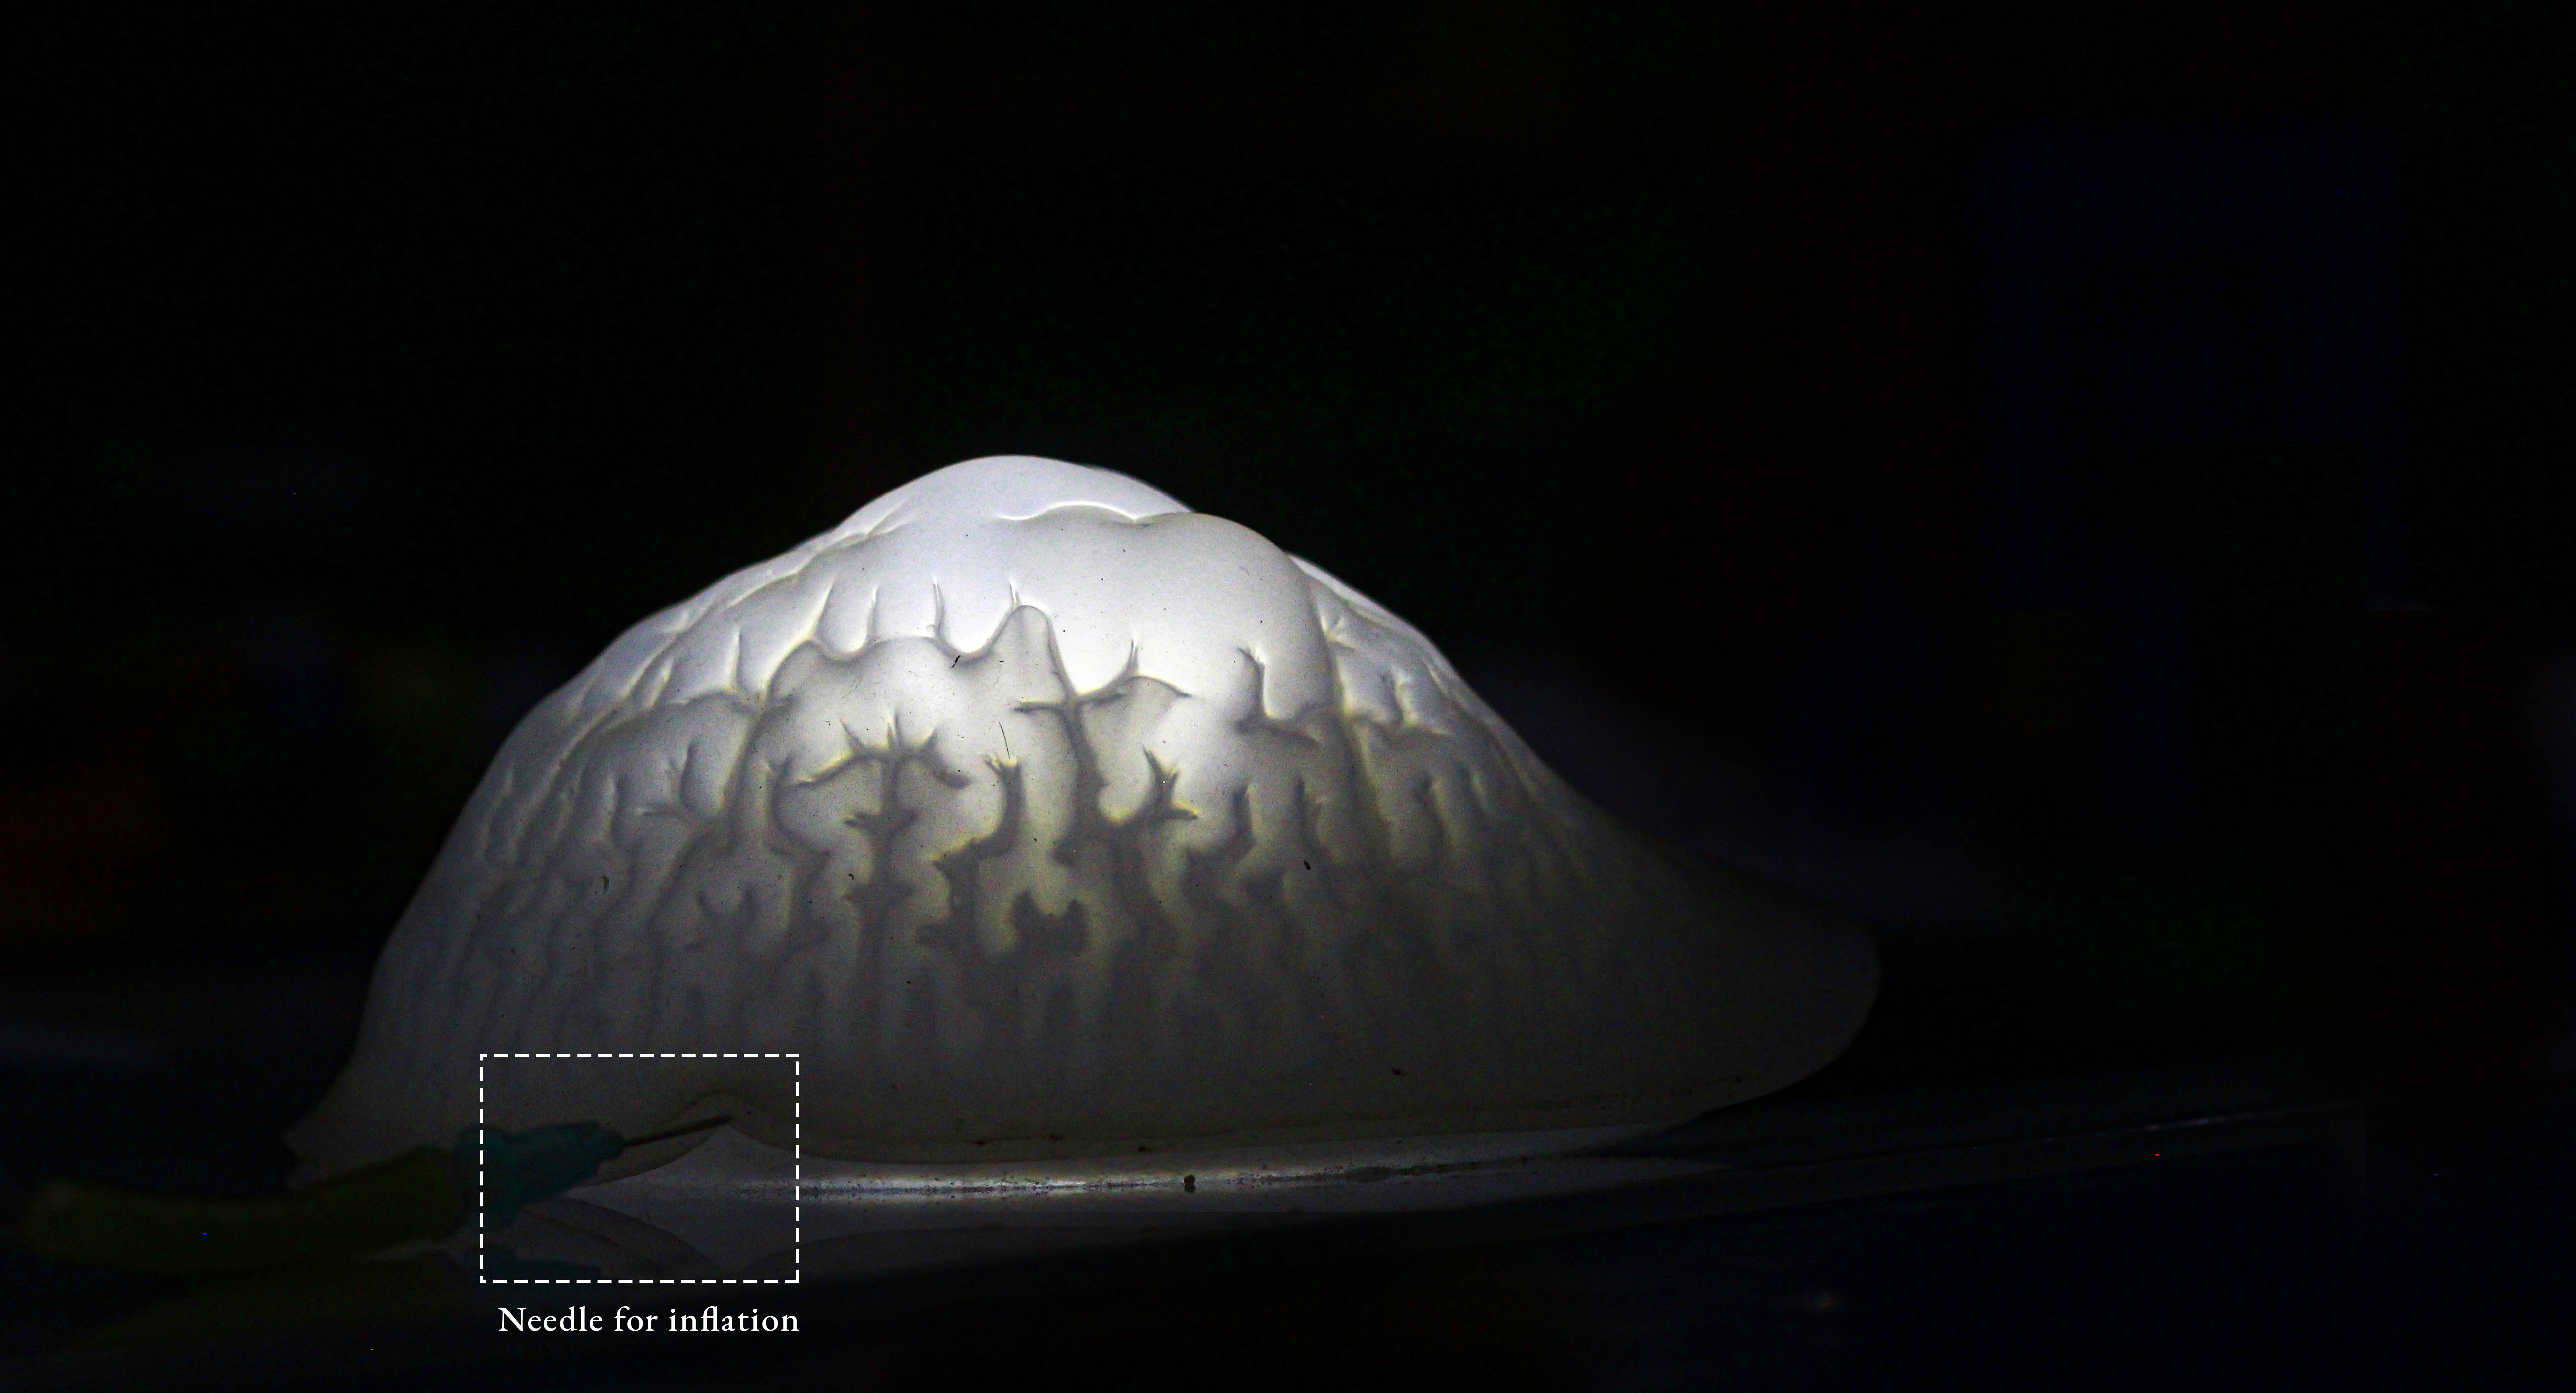
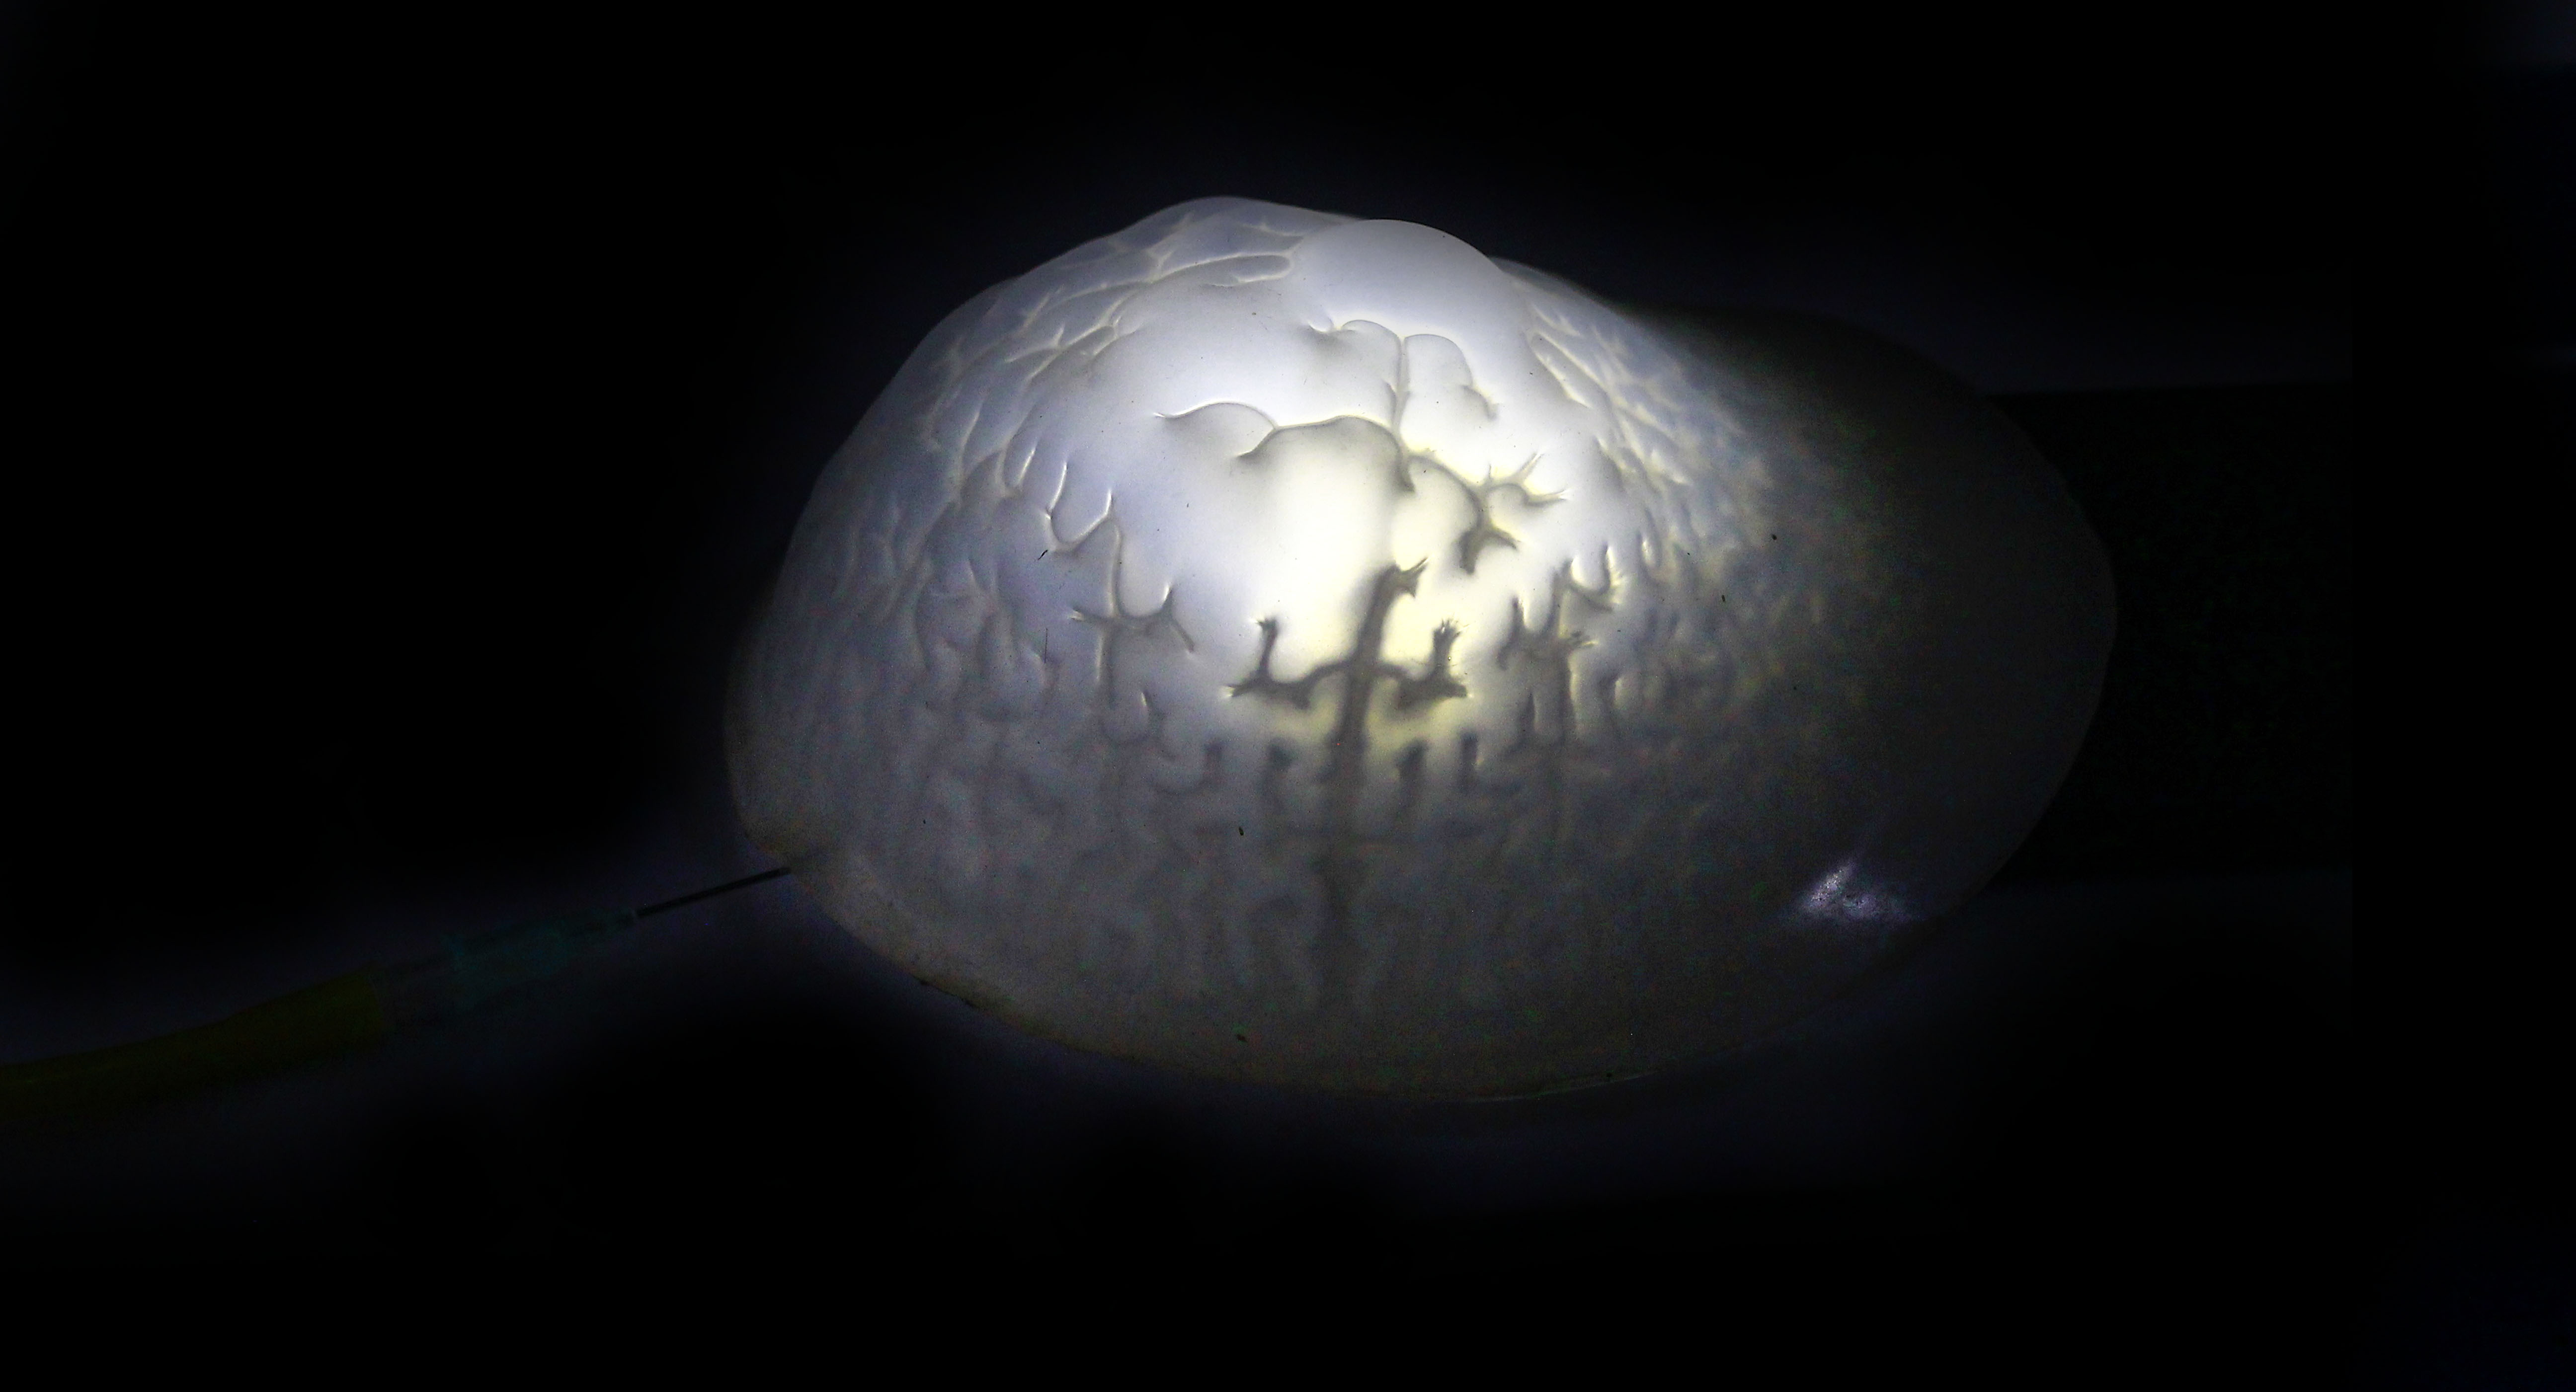
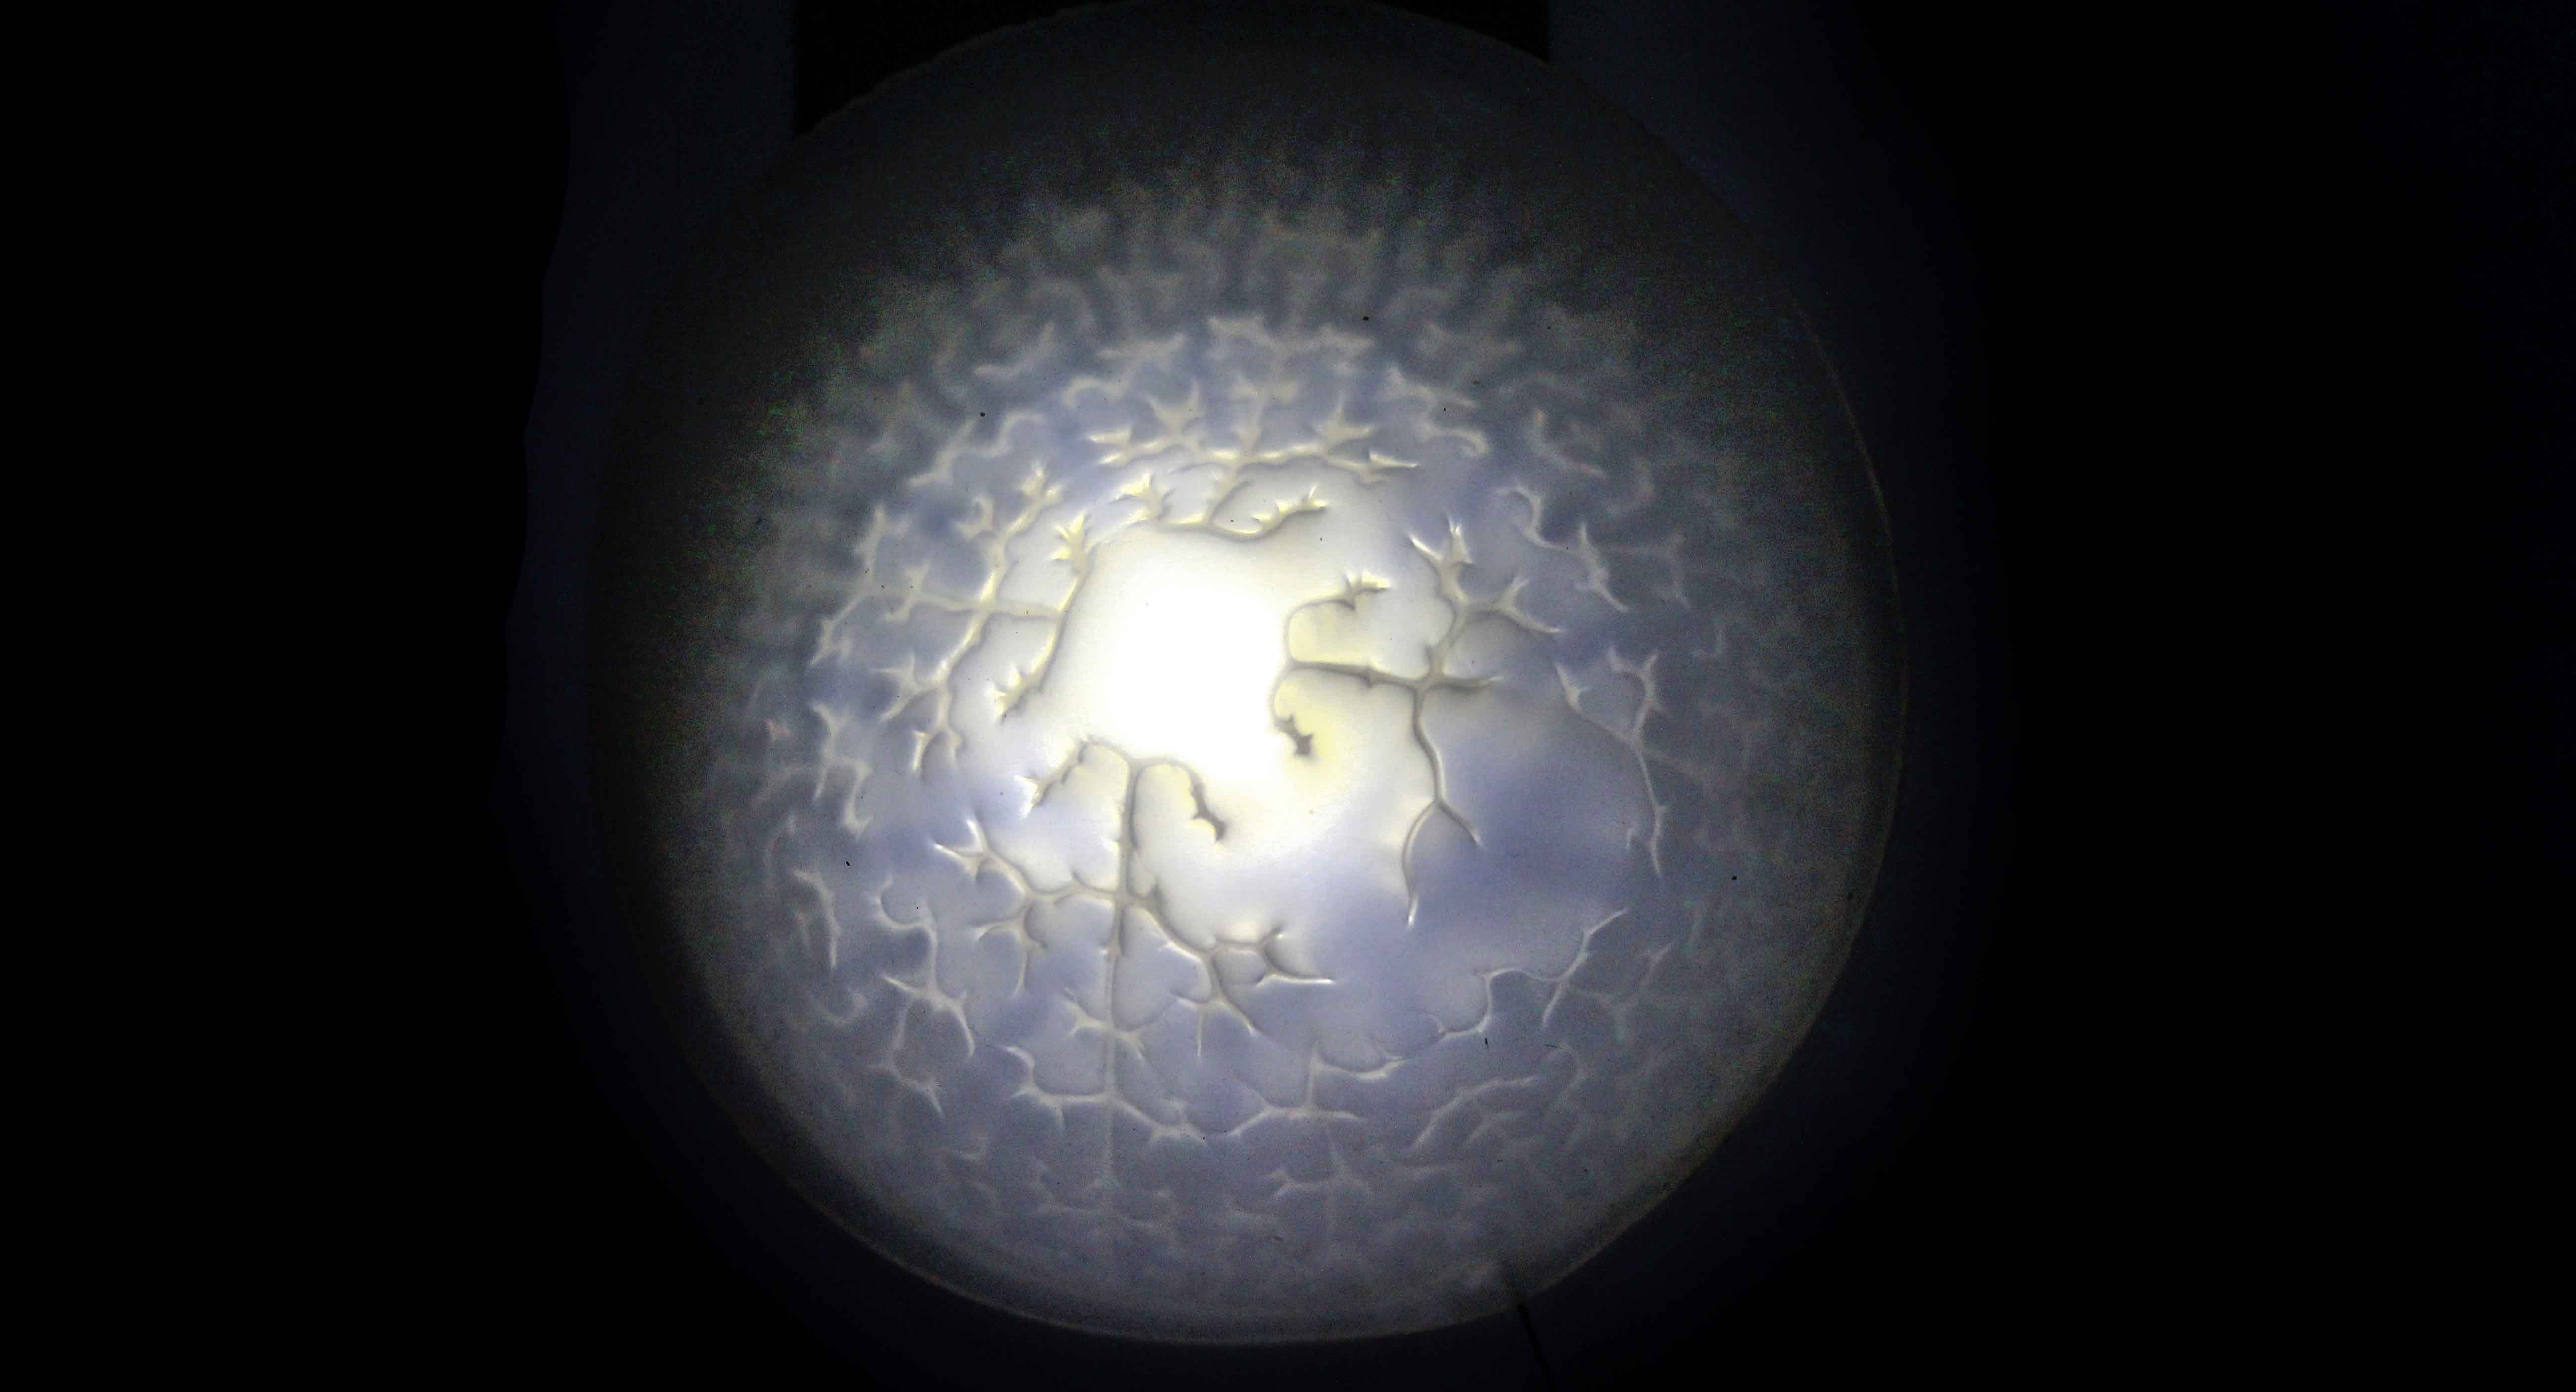
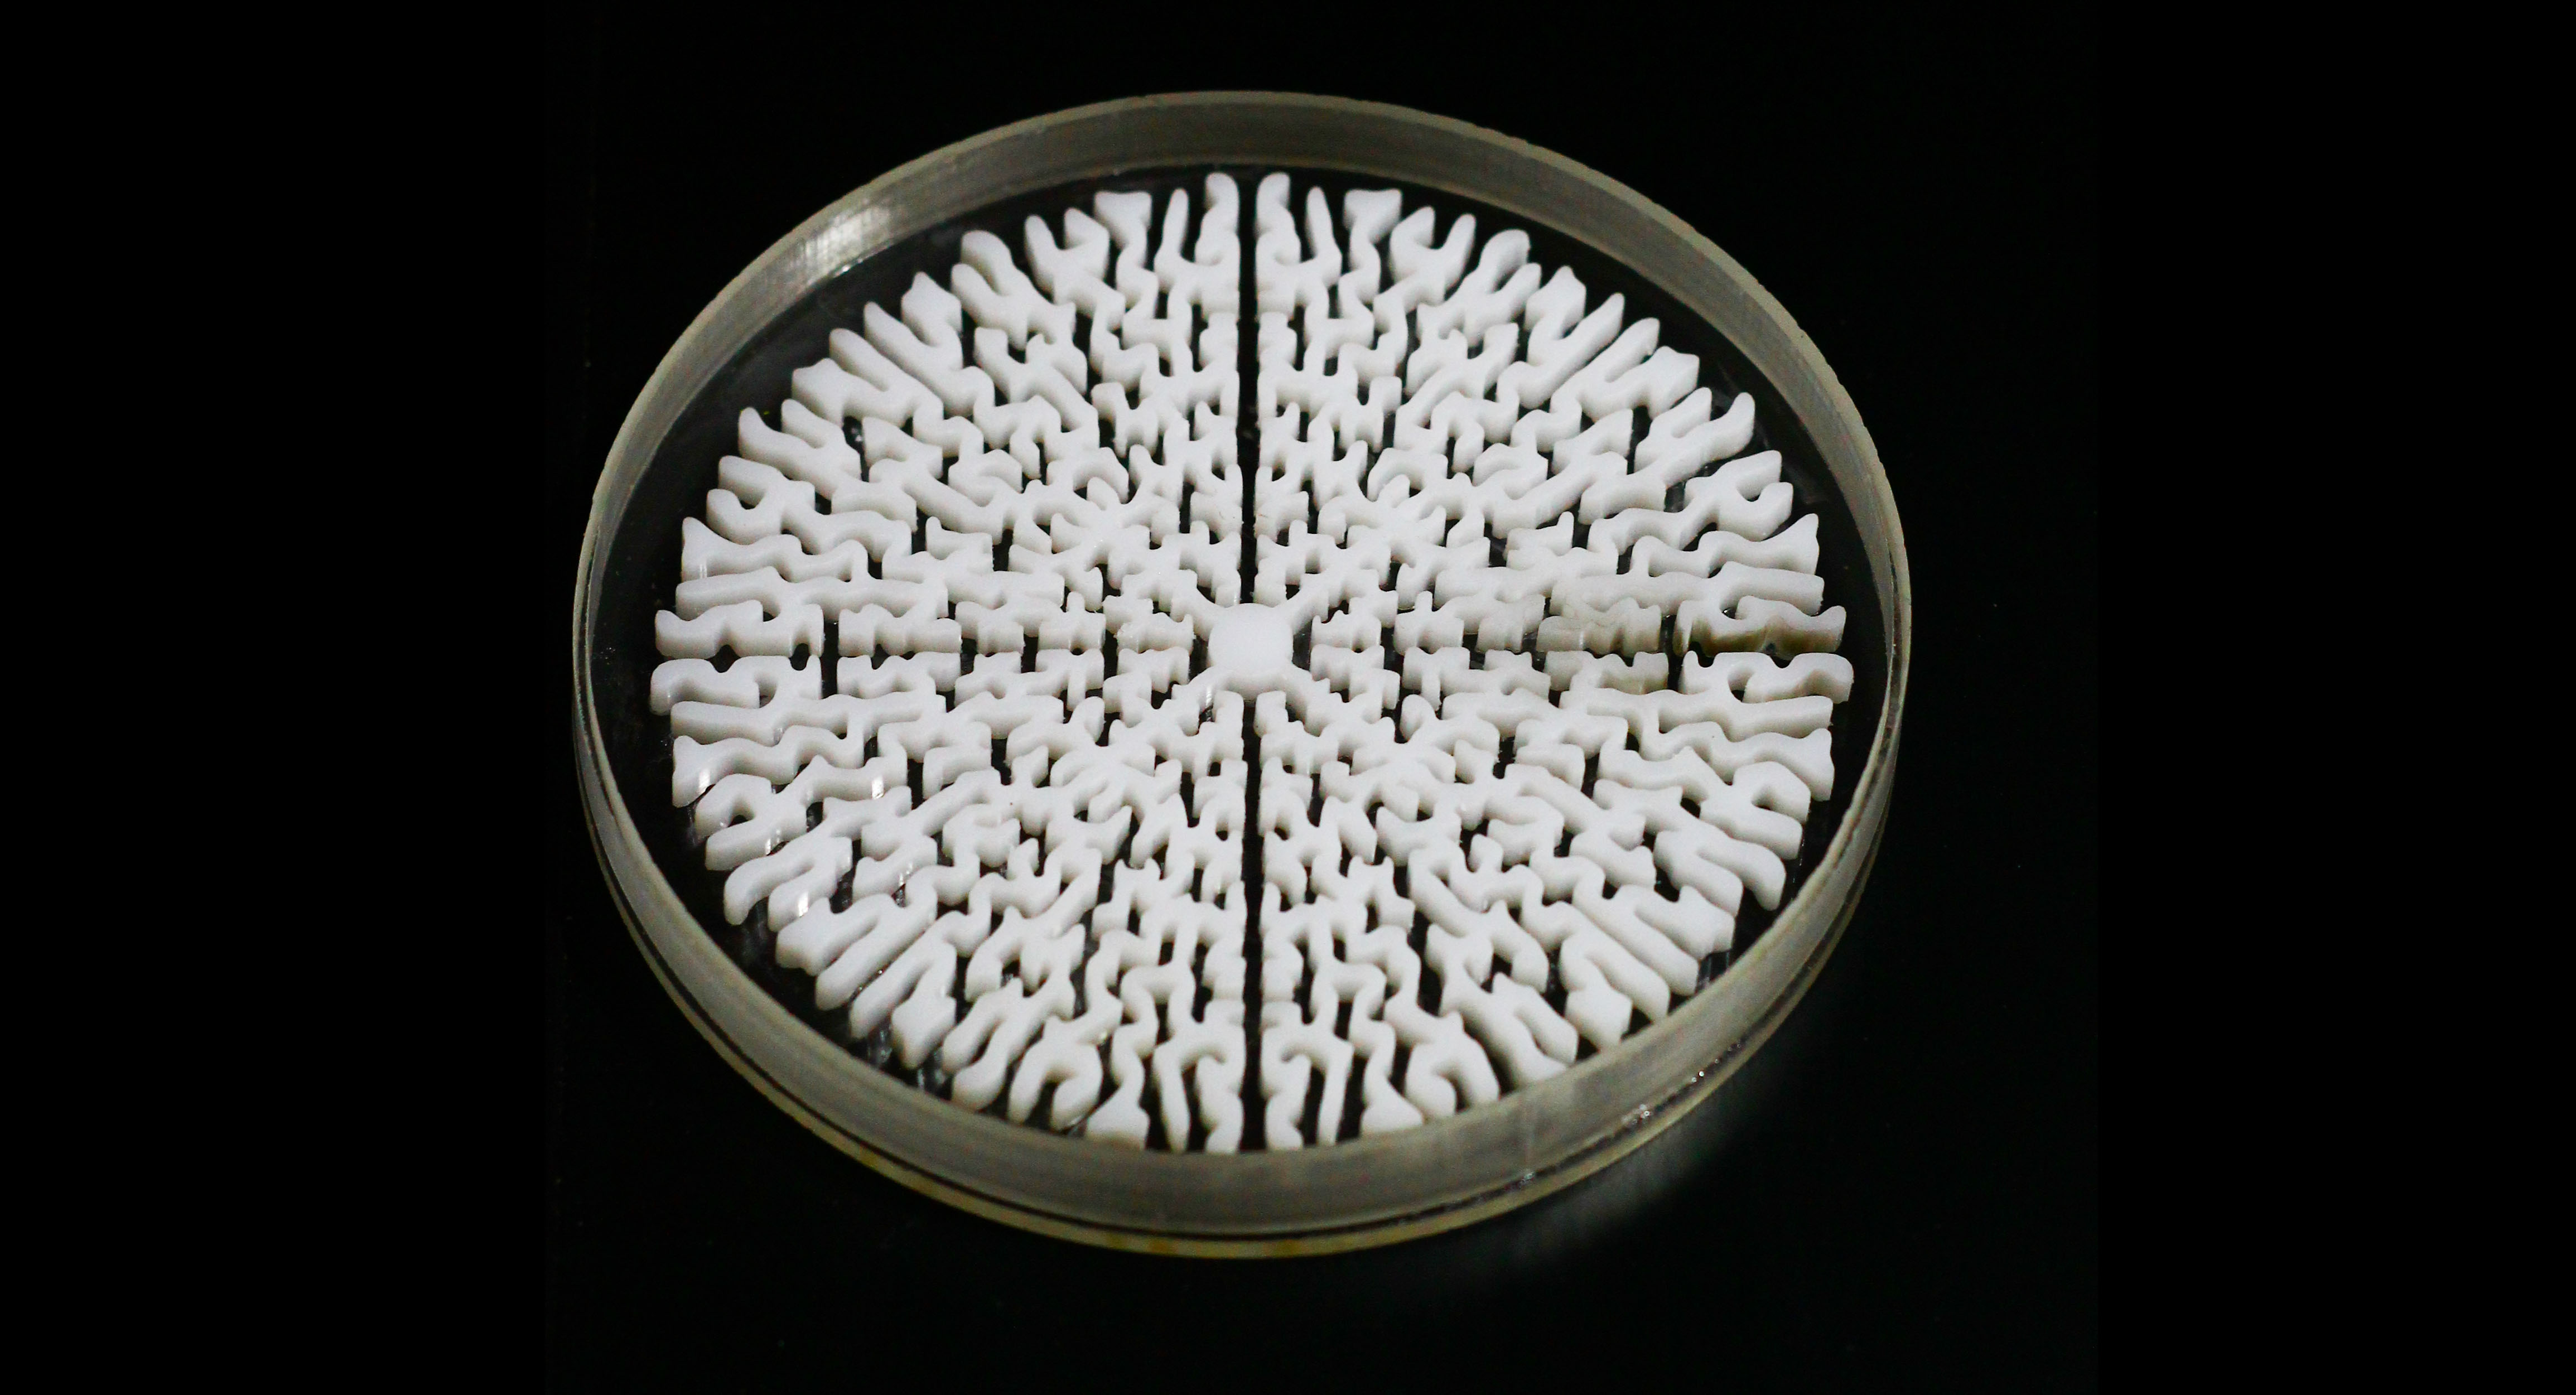
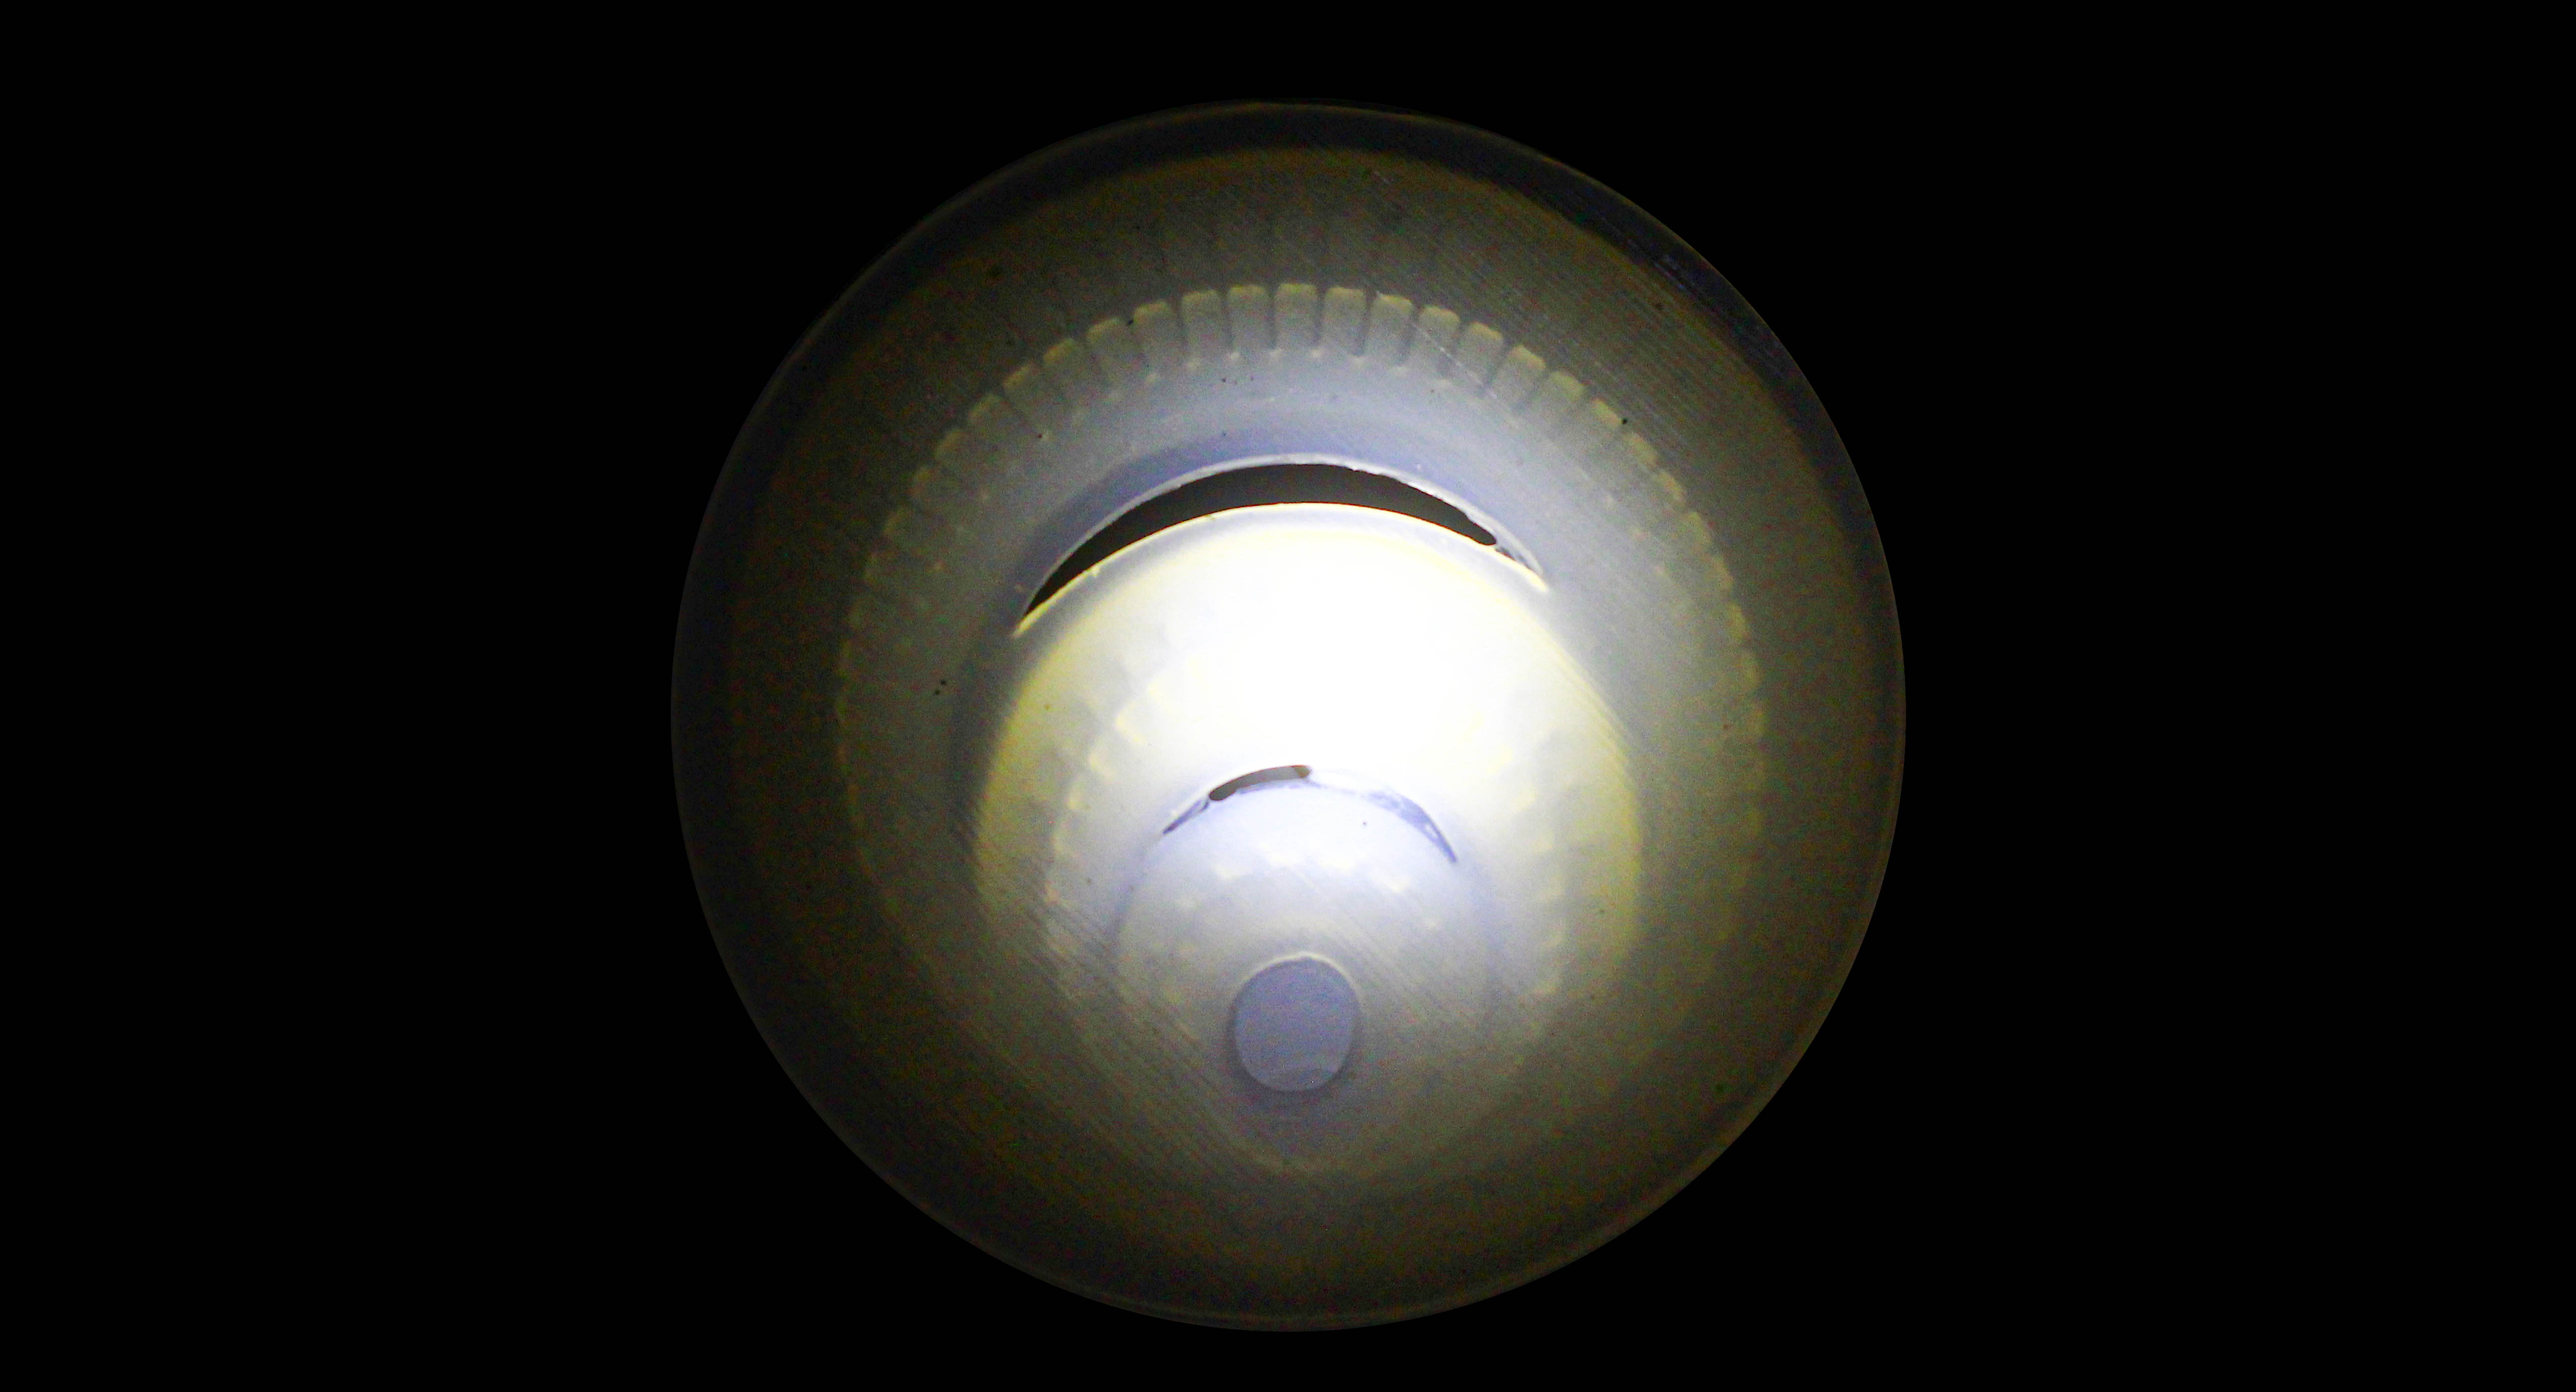
After pouring the silicone mix into the mold it took about 6 hours to cure. The pattern came out beautifully with very few bubbles inside. To inflate it, I again used the previous setup where I had used a surgical needle and poked into the silicone to inflate it. This particular shape was predicted to end up into a shell and the same happened when I inflated it. All the internal channels pushed the air outward to create a domed shell like structure.
Nested soft robotics
Brief Overview:
Continuing the process of exploration, I thought of applying the concept of nesting in soft robotics. The whole idea behind this process was to see what the the air pressure during the inflating process does to the form i.e. nesting form. I started with a very simple idea of using concentric circles pivoted at one end of the circle. Using the previous experience of how wide or thin the channels have to be I came to an optimal width that will help in inflating the soft robotic form. This time I choose 3D printing as a method to create the mold because of the curvy nature of the mold.
Modelling
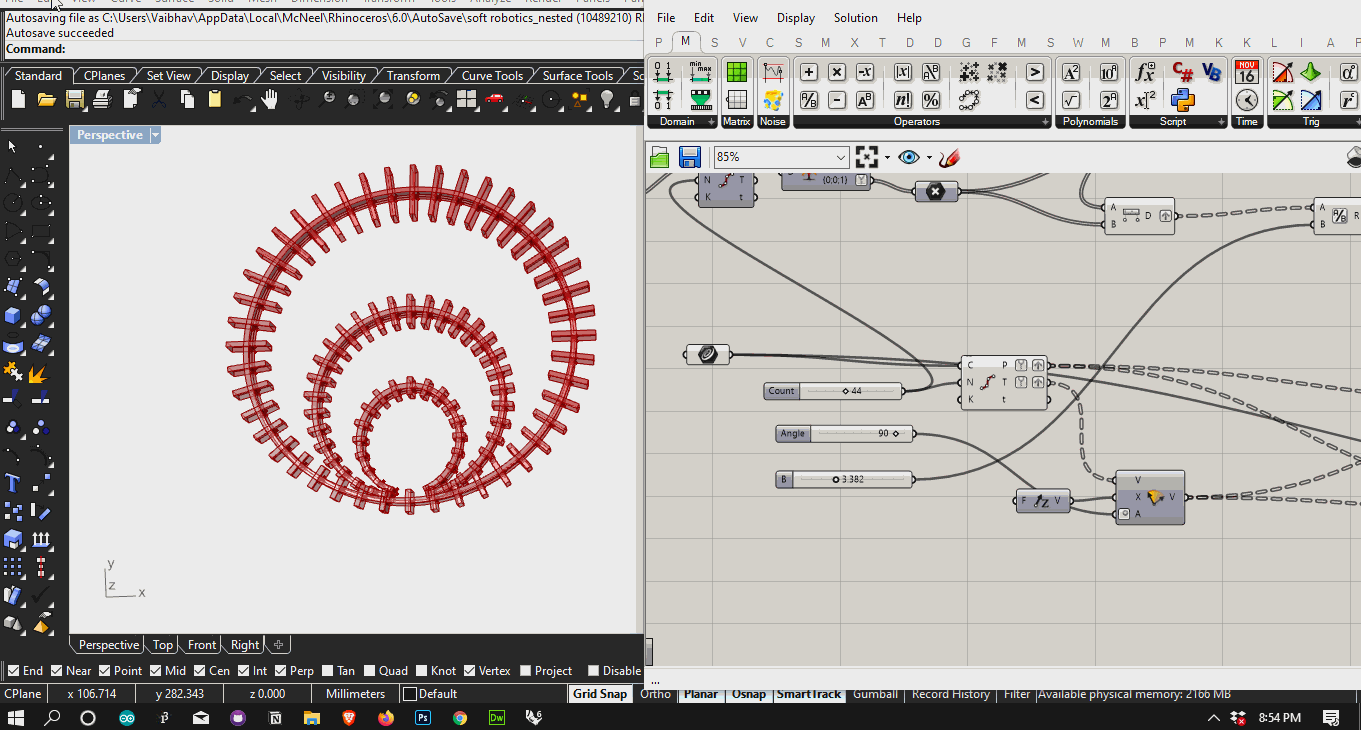
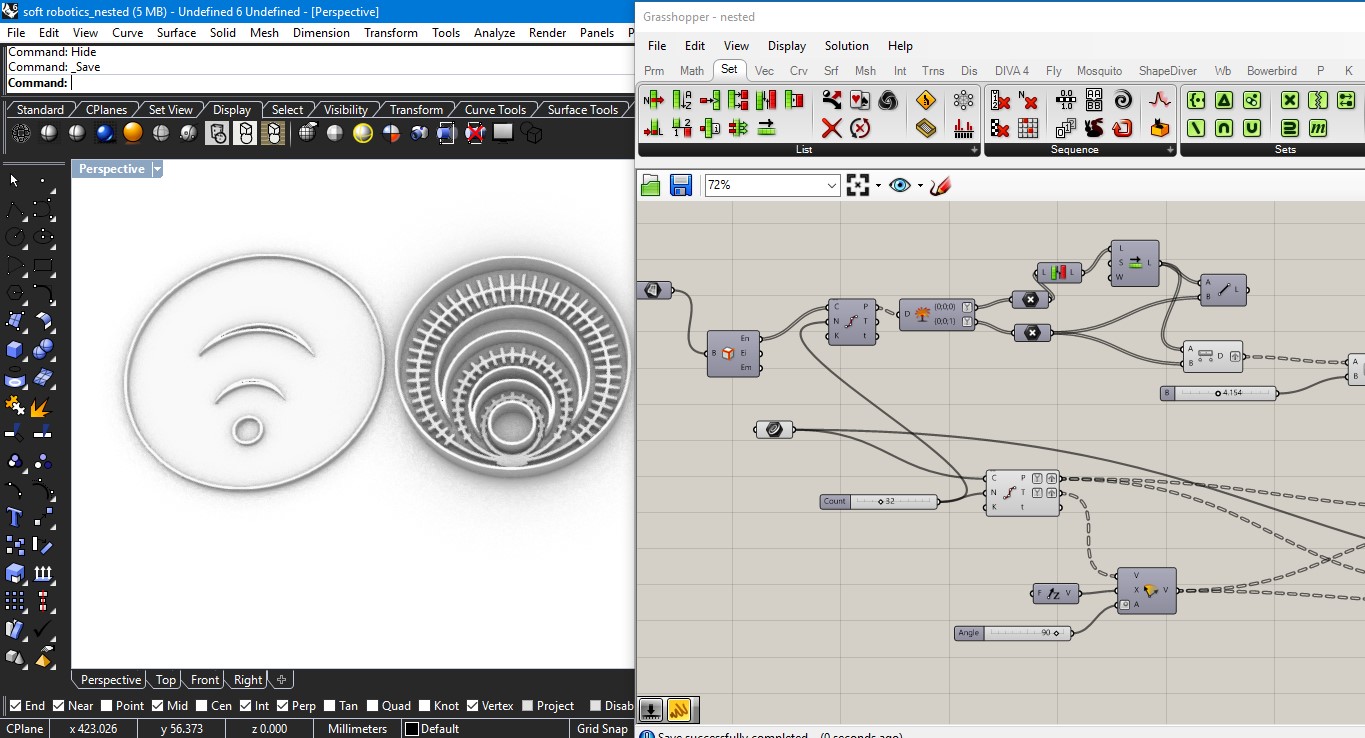
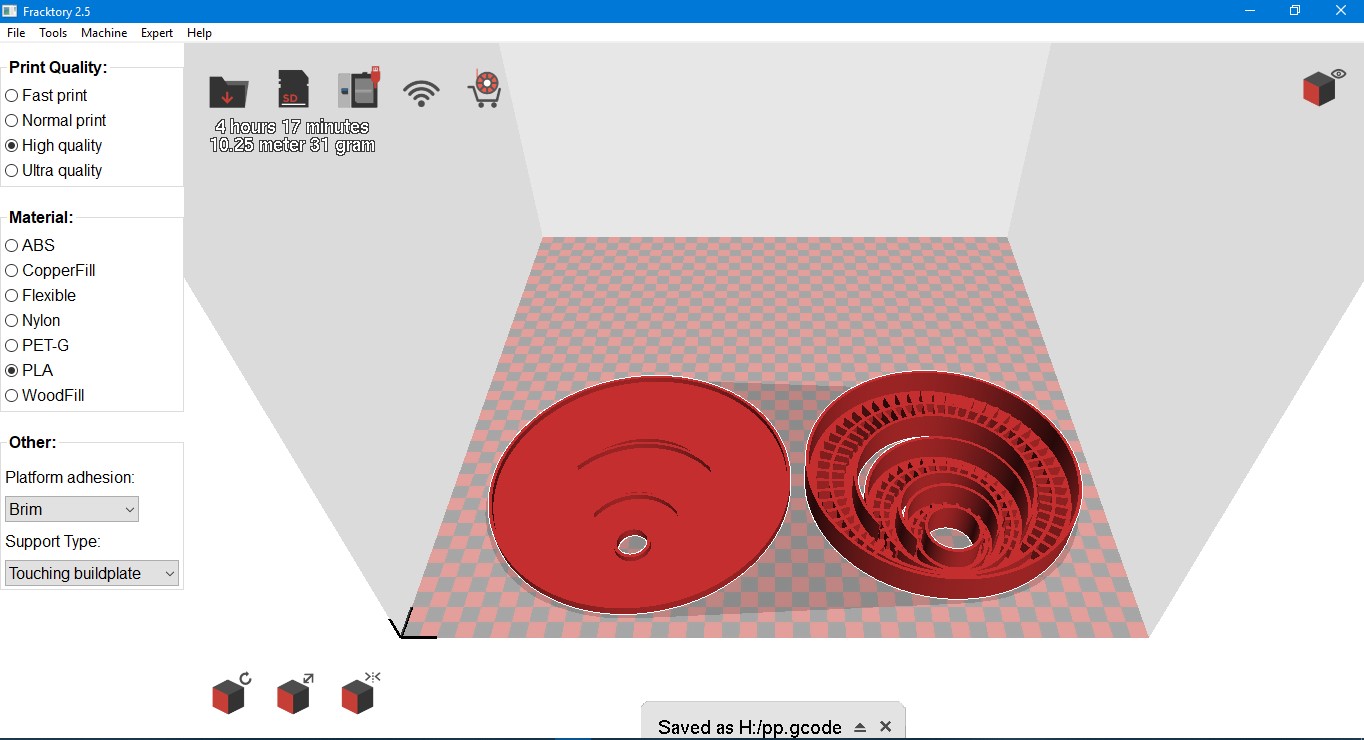
As usual there are two components of the soft robotics. One, that gets expanded and the other that has channels in it. The one that gets expanded is usually larger(wider) than the other one. The one with channels is 3D printed and the silicone mix in poured into it. The silicone takes arround 6-7 hours to cure.
Making- preparation of the mold

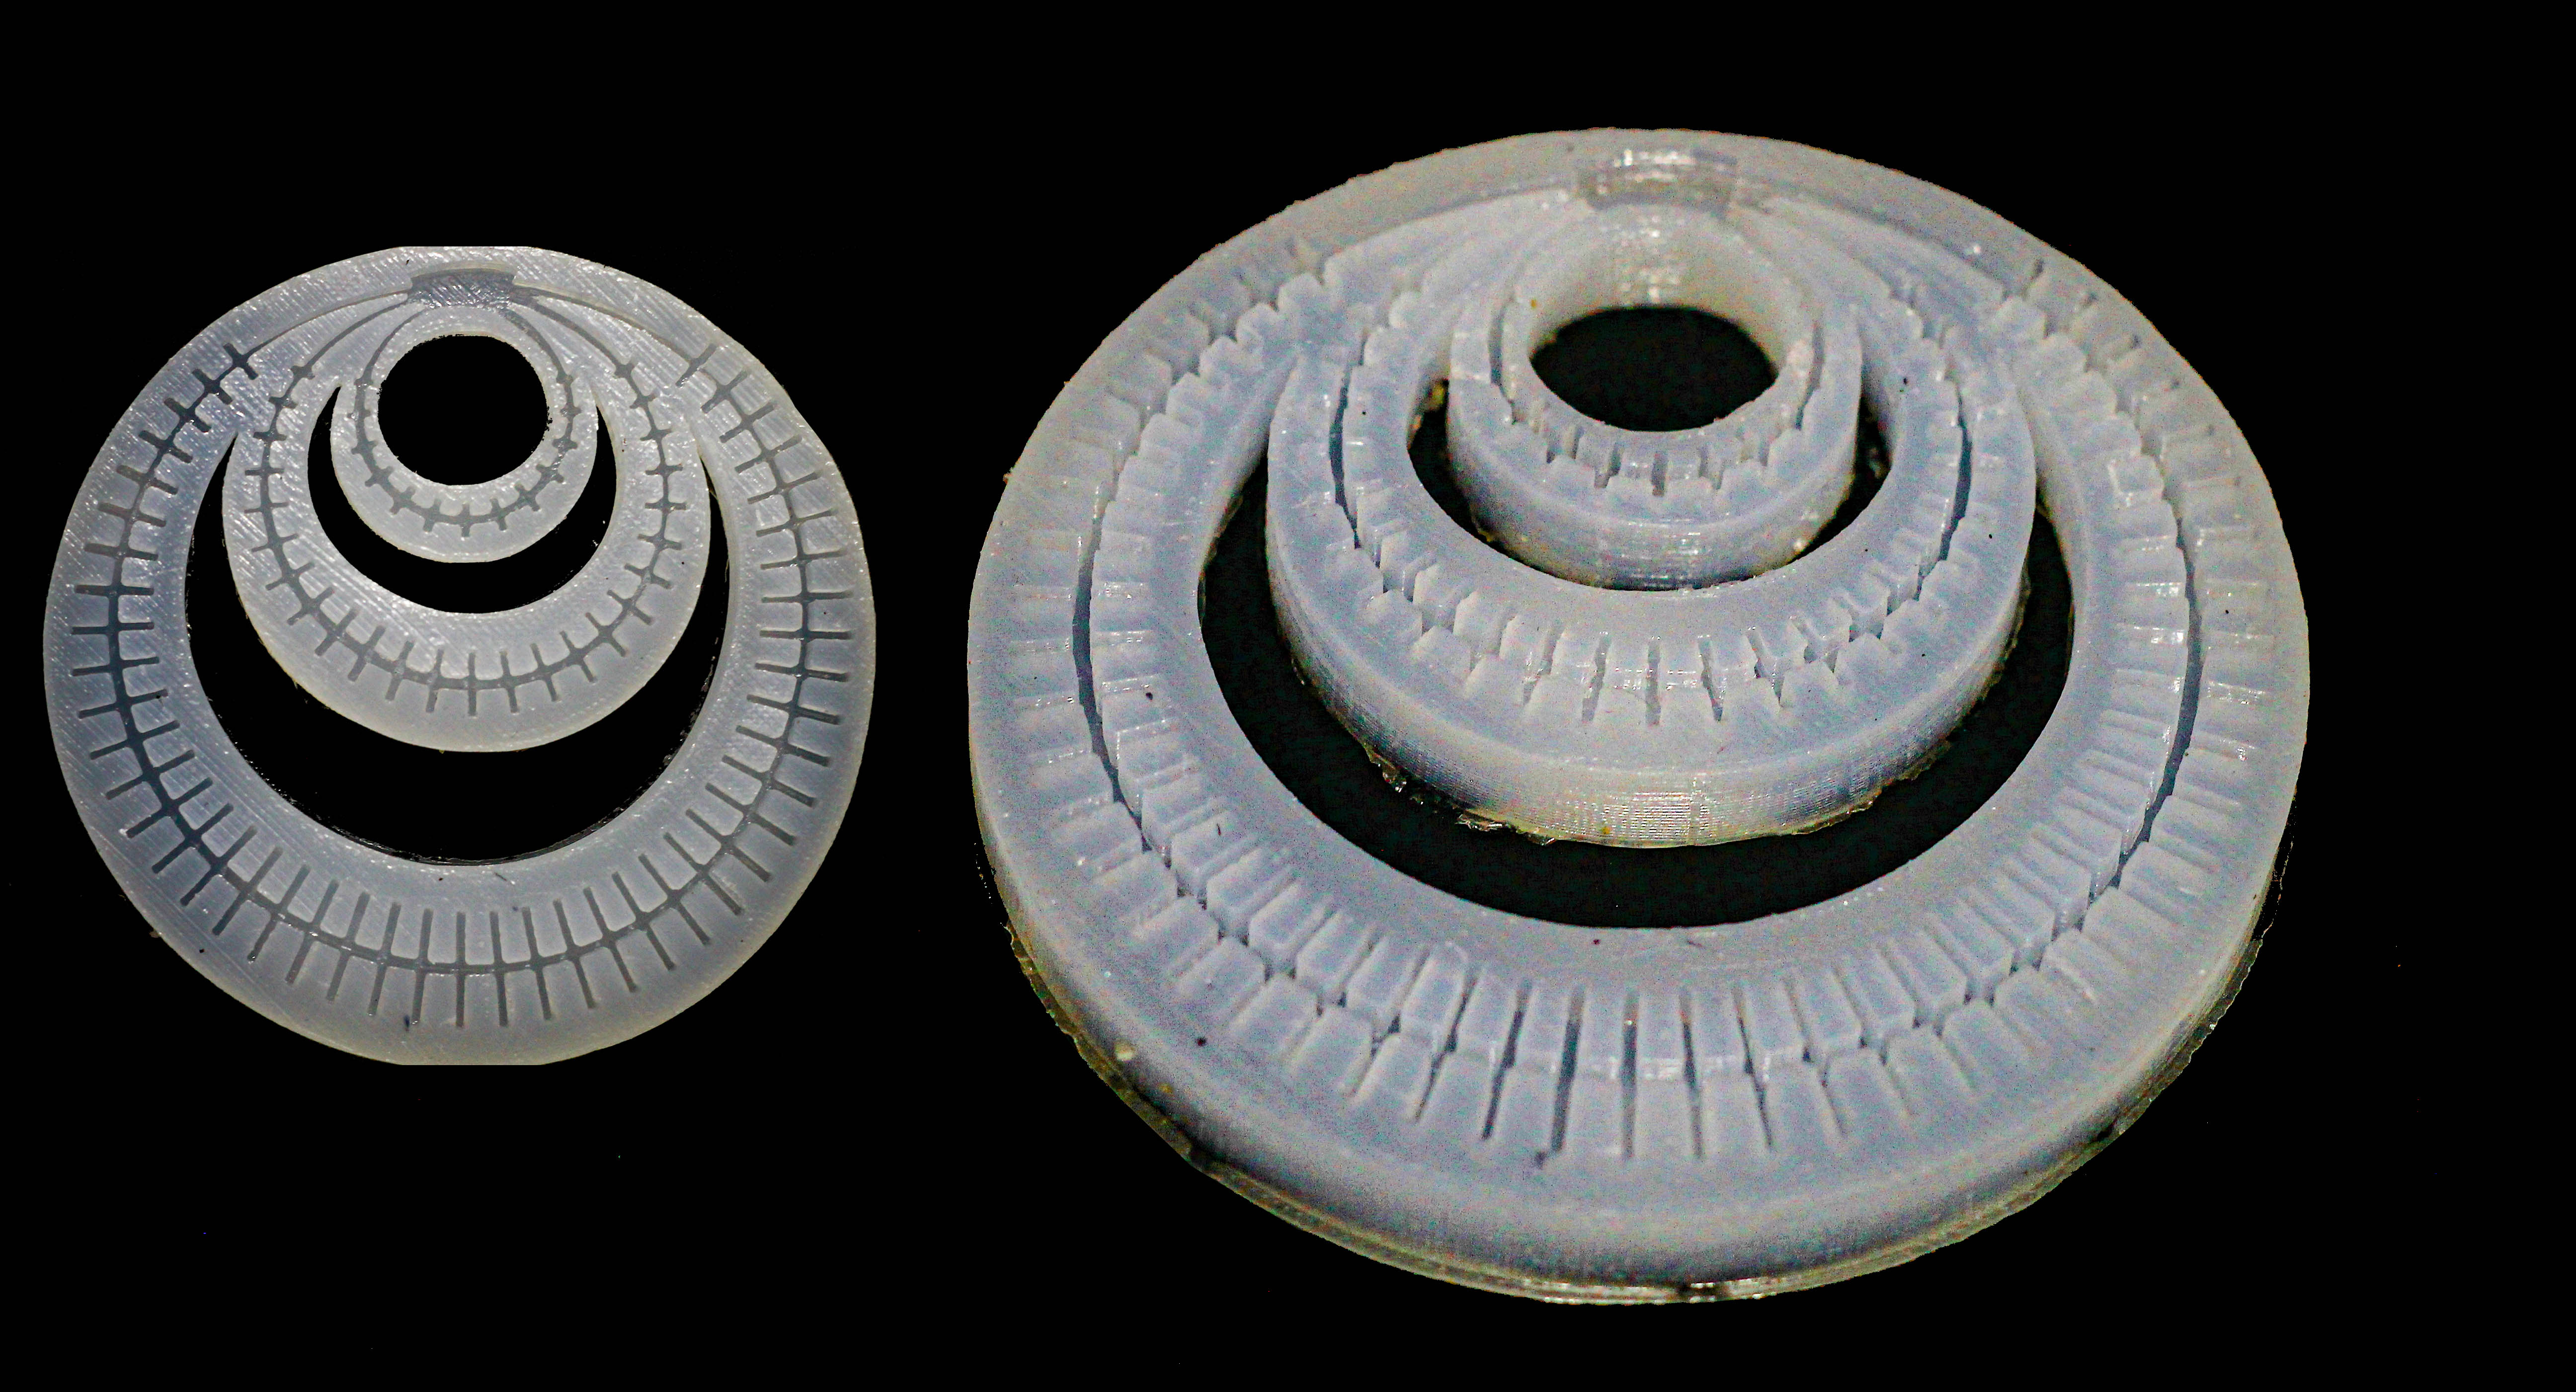
Once we have two diffrent silicone parts with us, we can glue both the parts together using the silicone mix. This process again takes couple of hours.
Inflating
Once everything was ready, I used the same procedure done in previous experiments to inflate my the silicone prototype. I used a surgical needle to poke inside the silicone prototype to allow the air pressure to inflate it. In this particular case, I didn't predict how the nested silicone prototype would behave, whether it will do locomotion or take up some form? The moment I inflated the nested silicone prototype, only the outer circle with channels got inflated, the inner ones didn't get inflated.
Electronics for soft robotics
Brief Overview:
At one point of time I started feeling that its very important to have to integrate electronics with soft pneumatics. The electronics will essentially be the control for the air flow in and out of the soft robotics. This can also be thought of as controlling the air or programming the air. The one project that has already been built around this concept is called Programmable Air, but it is expensive. Hence, I thought it would be great to get inspired and make a cheaper version of the same. In the images below, I have given a sneek peek into creating a basic electronic board for controlling the air.
Steps
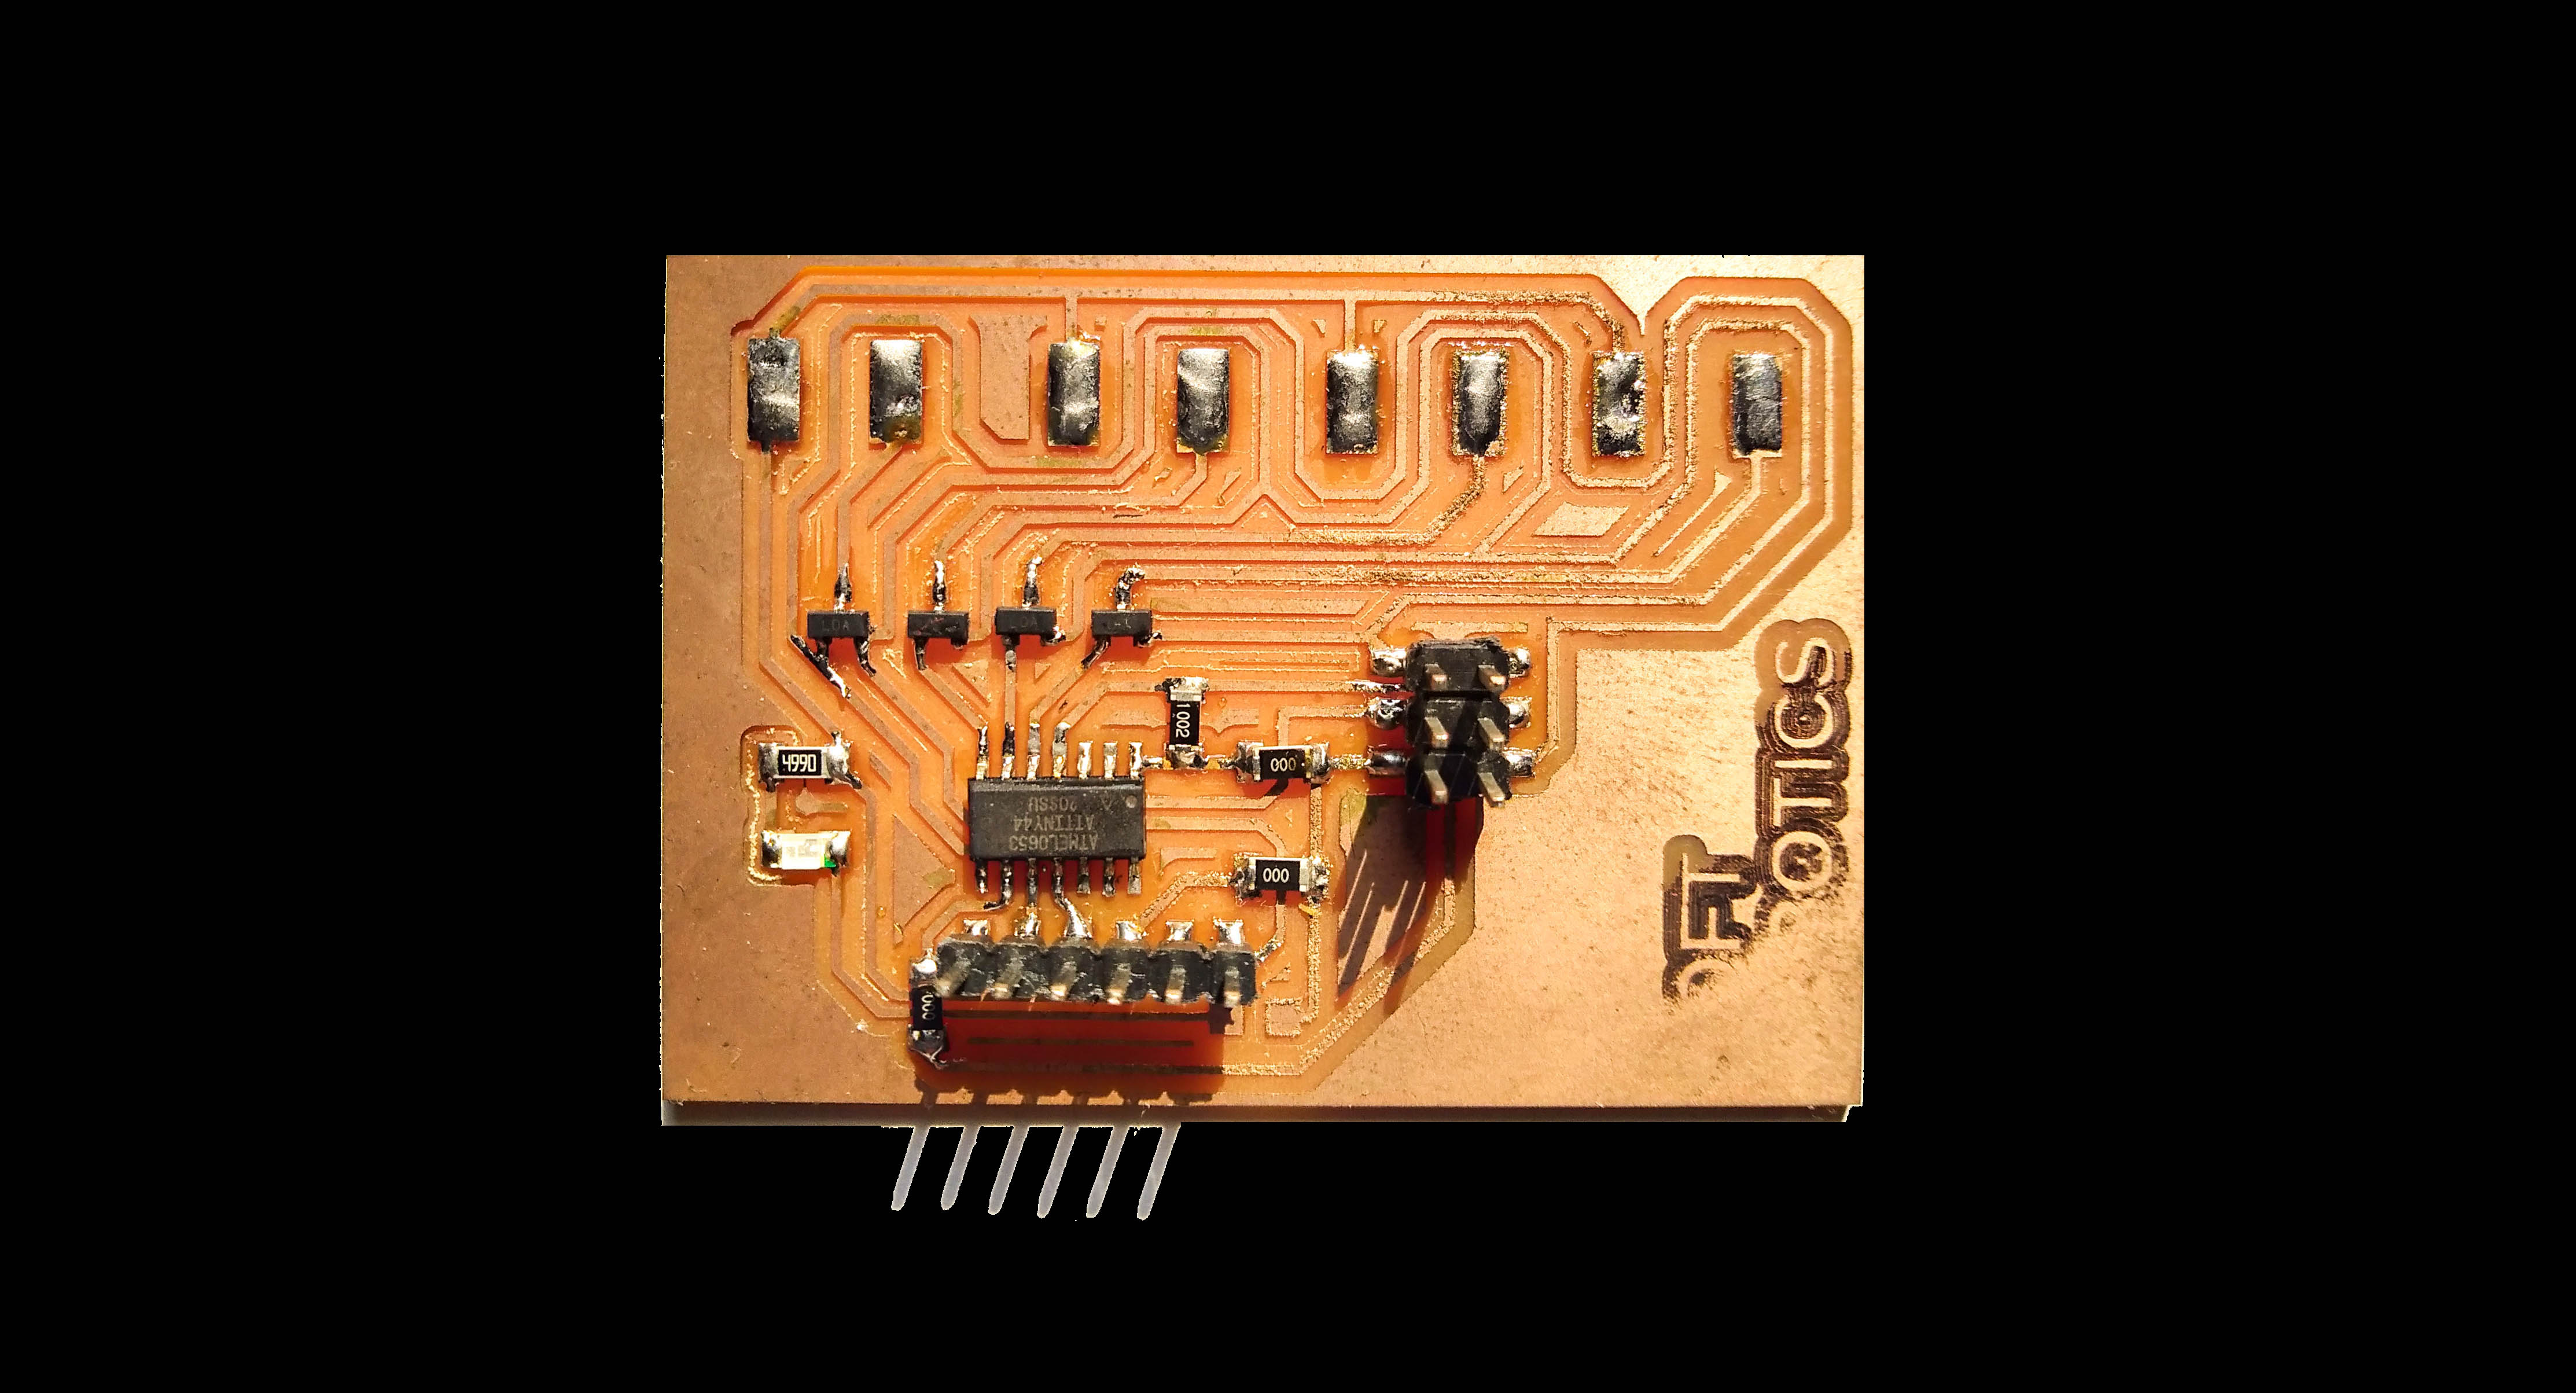
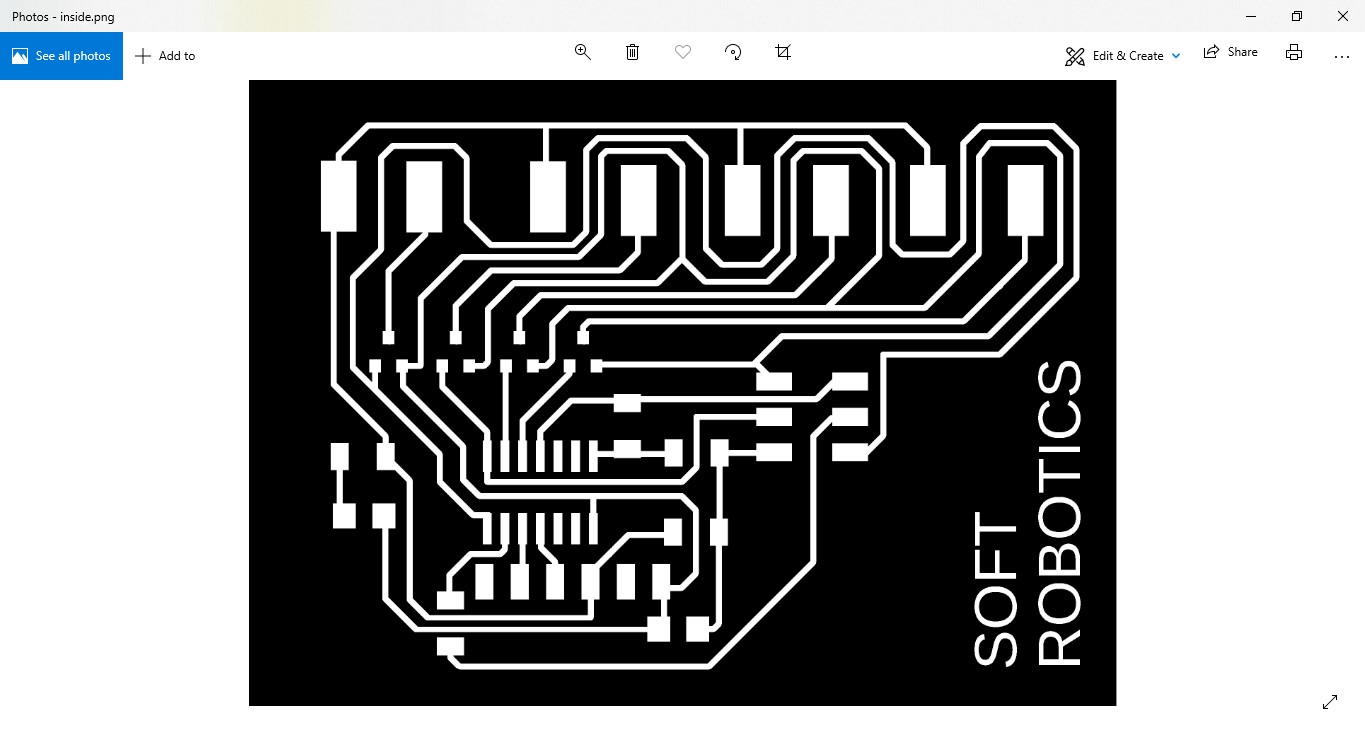
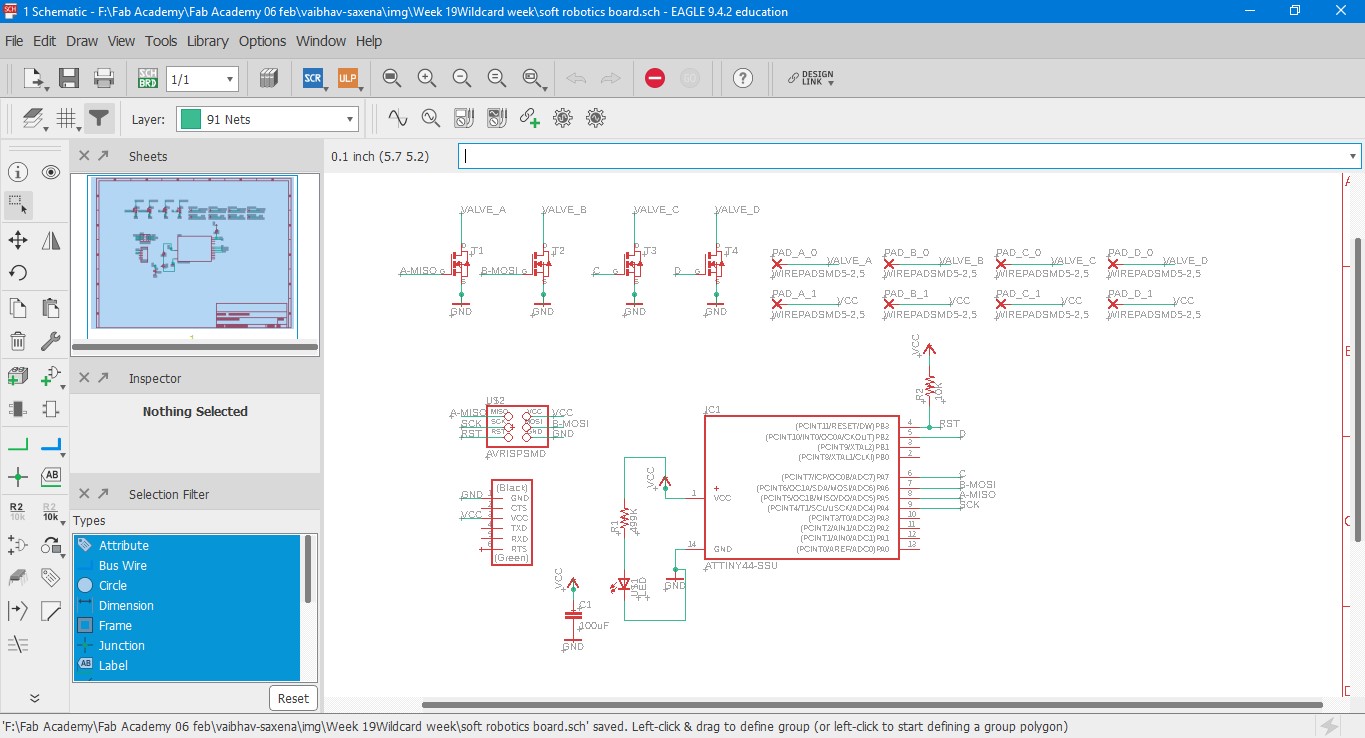

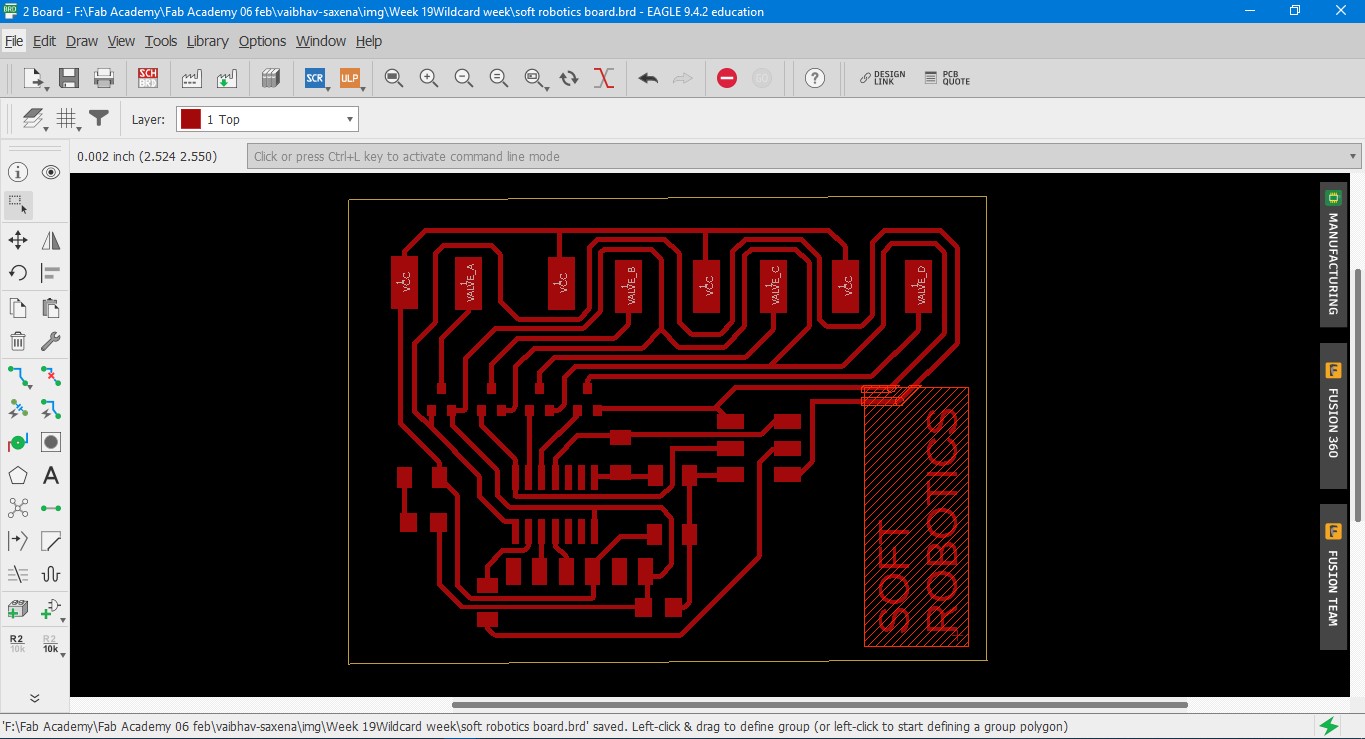

Following is the list of components used in the production of electronic board:
1. 1x ATtiny 44
2. 4x MOSFET
3. 1x 499K ohm resistor
4. 1x 100uF capacitor
5. 1x 2x3 ISP header
6. 1x 10K ohm resistor
7. 3x 0K ohm resistor